How to use P-touch Editor
6
2
[Professional] mode
This mode allows you to create templates using a wide-range of advanced tools and options.
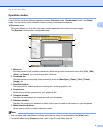
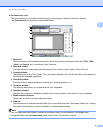
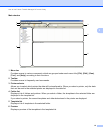
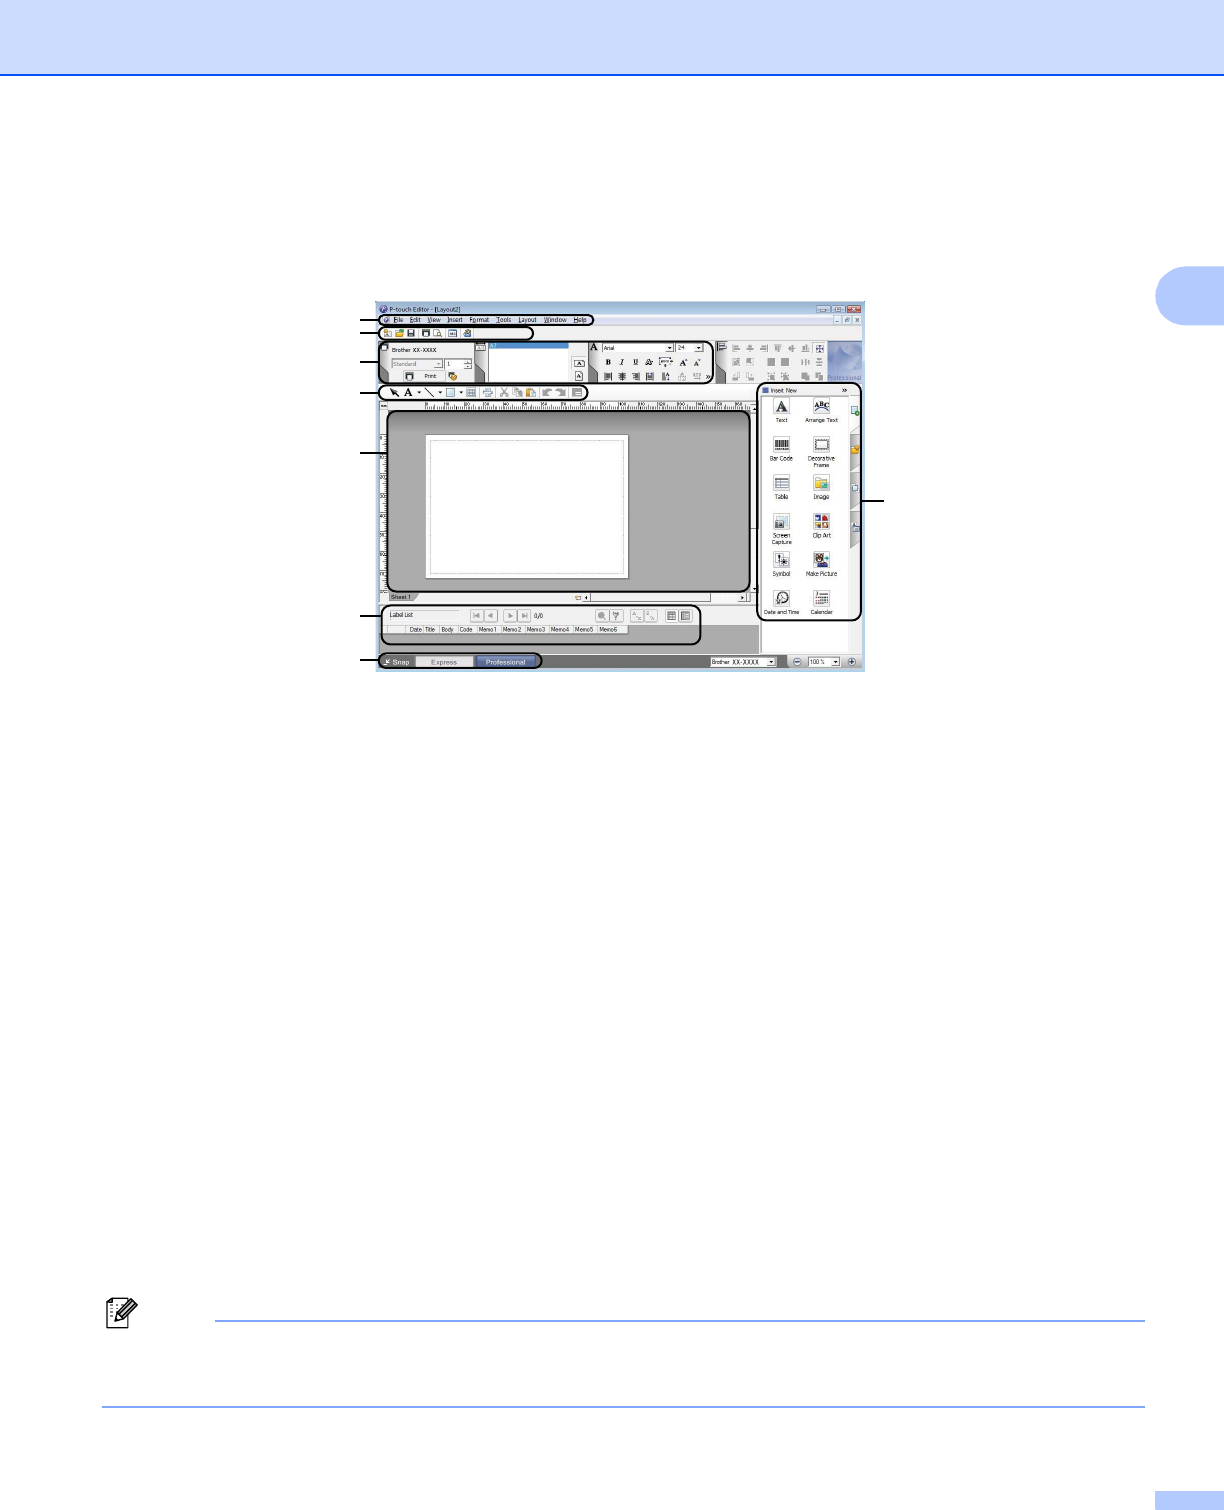
The [Professional] mode screen is explained below.
1 Menu bar
Provides access to all available commands, which are grouped under each menu title ([File], [Edit],
[View], and [Insert], etc.) according to their functions.
2 Standard toolbar
Provides access to frequently used commands, such as New Layout, Open, Save, Print, etc.
3 Property palette
Provides access to the Print, Paper, Text, and Layout palettes. Click on the left side of each palette to
show/hide the available properties.
4 Draw/Edit toolbar
Provides tools for selecting objects, entering text, drawing graphics, etc.
5 Template window
Provides the area where you create and edit your templates.
6 Database window
Displays the content of a database or label list that can be used to add content to your templates.
7 Mode selection buttons
Allows you to switch to another operation mode.
8Side bar
Provides access to different tabs that allow you to insert and format text, bar codes, tables, etc., change
the order of the objects to create a template, or set advanced settings.
Note
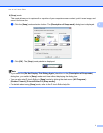
• You can show and hide different toolbars and windows using the commands in the [View] menu.
• For details about using [Professional] mode, refer to the P-touch Editor help file.
7
2
1
3
4
8
6
5


