


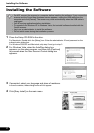
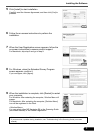


Preparing the Scanner
4
Preparing the Scanner
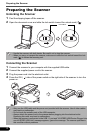
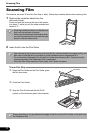
Unlocking the Scanner
1 Peel the shipping tapes off the scanner.
2 Open the document cover and slide the lock switch toward the unlock mark ( ).
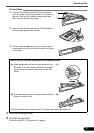
Connecting the Scanner
1 Connect the scanner to your computer with the supplied USB cable.
2 Connect the supplied power cord to the scanner.
3 Plug the power cord into the electrical outlet.
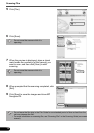
4 Press the ON ( ) side of the power switch on the right side of the scanner to turn the
power on.
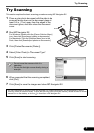
• Handle the scanner with both hands. Be careful not to drop the scanner.
• When you carry or transport the scanner, make sure to slide the lock switch toward the lock
mark ( ) to fasten the scanning unit.
• Only use the USB cable and the power cord provided with the scanner. Use of other cables
may lead to a malfunction.
• Do not touch the metallic parts of the USB connector.
• Always attach the power cord to the scanner before plugging into the electrical outlet.
Reversing this order may lead to malfunctions.
• When the scanner is connected to the USB 1.1 port and "HI-SPEED USB Device Plugged into
non-HI-SPEED USB Hub" message appears, ignore the message. The scanner operates in
this condition without problems.
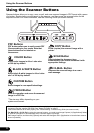
Unlock Mark