


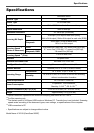


Try Scanning
5
Try Scanning
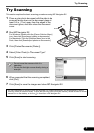
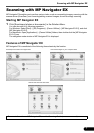
This section explains the basic scanning procedures using MP Navigator EX.
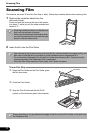
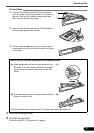
1 Place a color photo document with the side to be
scanned facing down on the document glass at
least 0.4 in. (1 cm) away from the edges of the
document glass, and then close the document
cover.
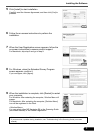
2 Start MP Navigator EX.
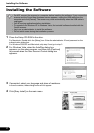
For Windows: Double-click the [Canon Solution Menu]
icon, then click [Scan/import photos or documents.].
For Macintosh: Click the [Solution Menu] icon in the
Dock, then click [Scan/import photos or documents.].
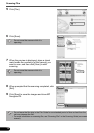
3 Click [Photos/Documents (Platen)].
4 Select [Color Photo] in "Document Type".
5 Click [Scan] to start scanning.
6 When prompted that the scanning completed,
click [Exit].
7 Click [Save] to save the images and close MP Navigator EX.
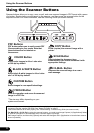
• Do not move the scanner while it is
operating.
• Do not see the light source directly during a
scan job.
• For more information on scanning using MP Navigator EX, bundled applications, and troubleshooting, see the
Scanning Guide (on-screen manual). To open the Scanning Guide (on-screen manual), double-click the on-screen
manual icon on the desktop, or click on in ScanGear or MP Navigator EX.
Bottom
Top