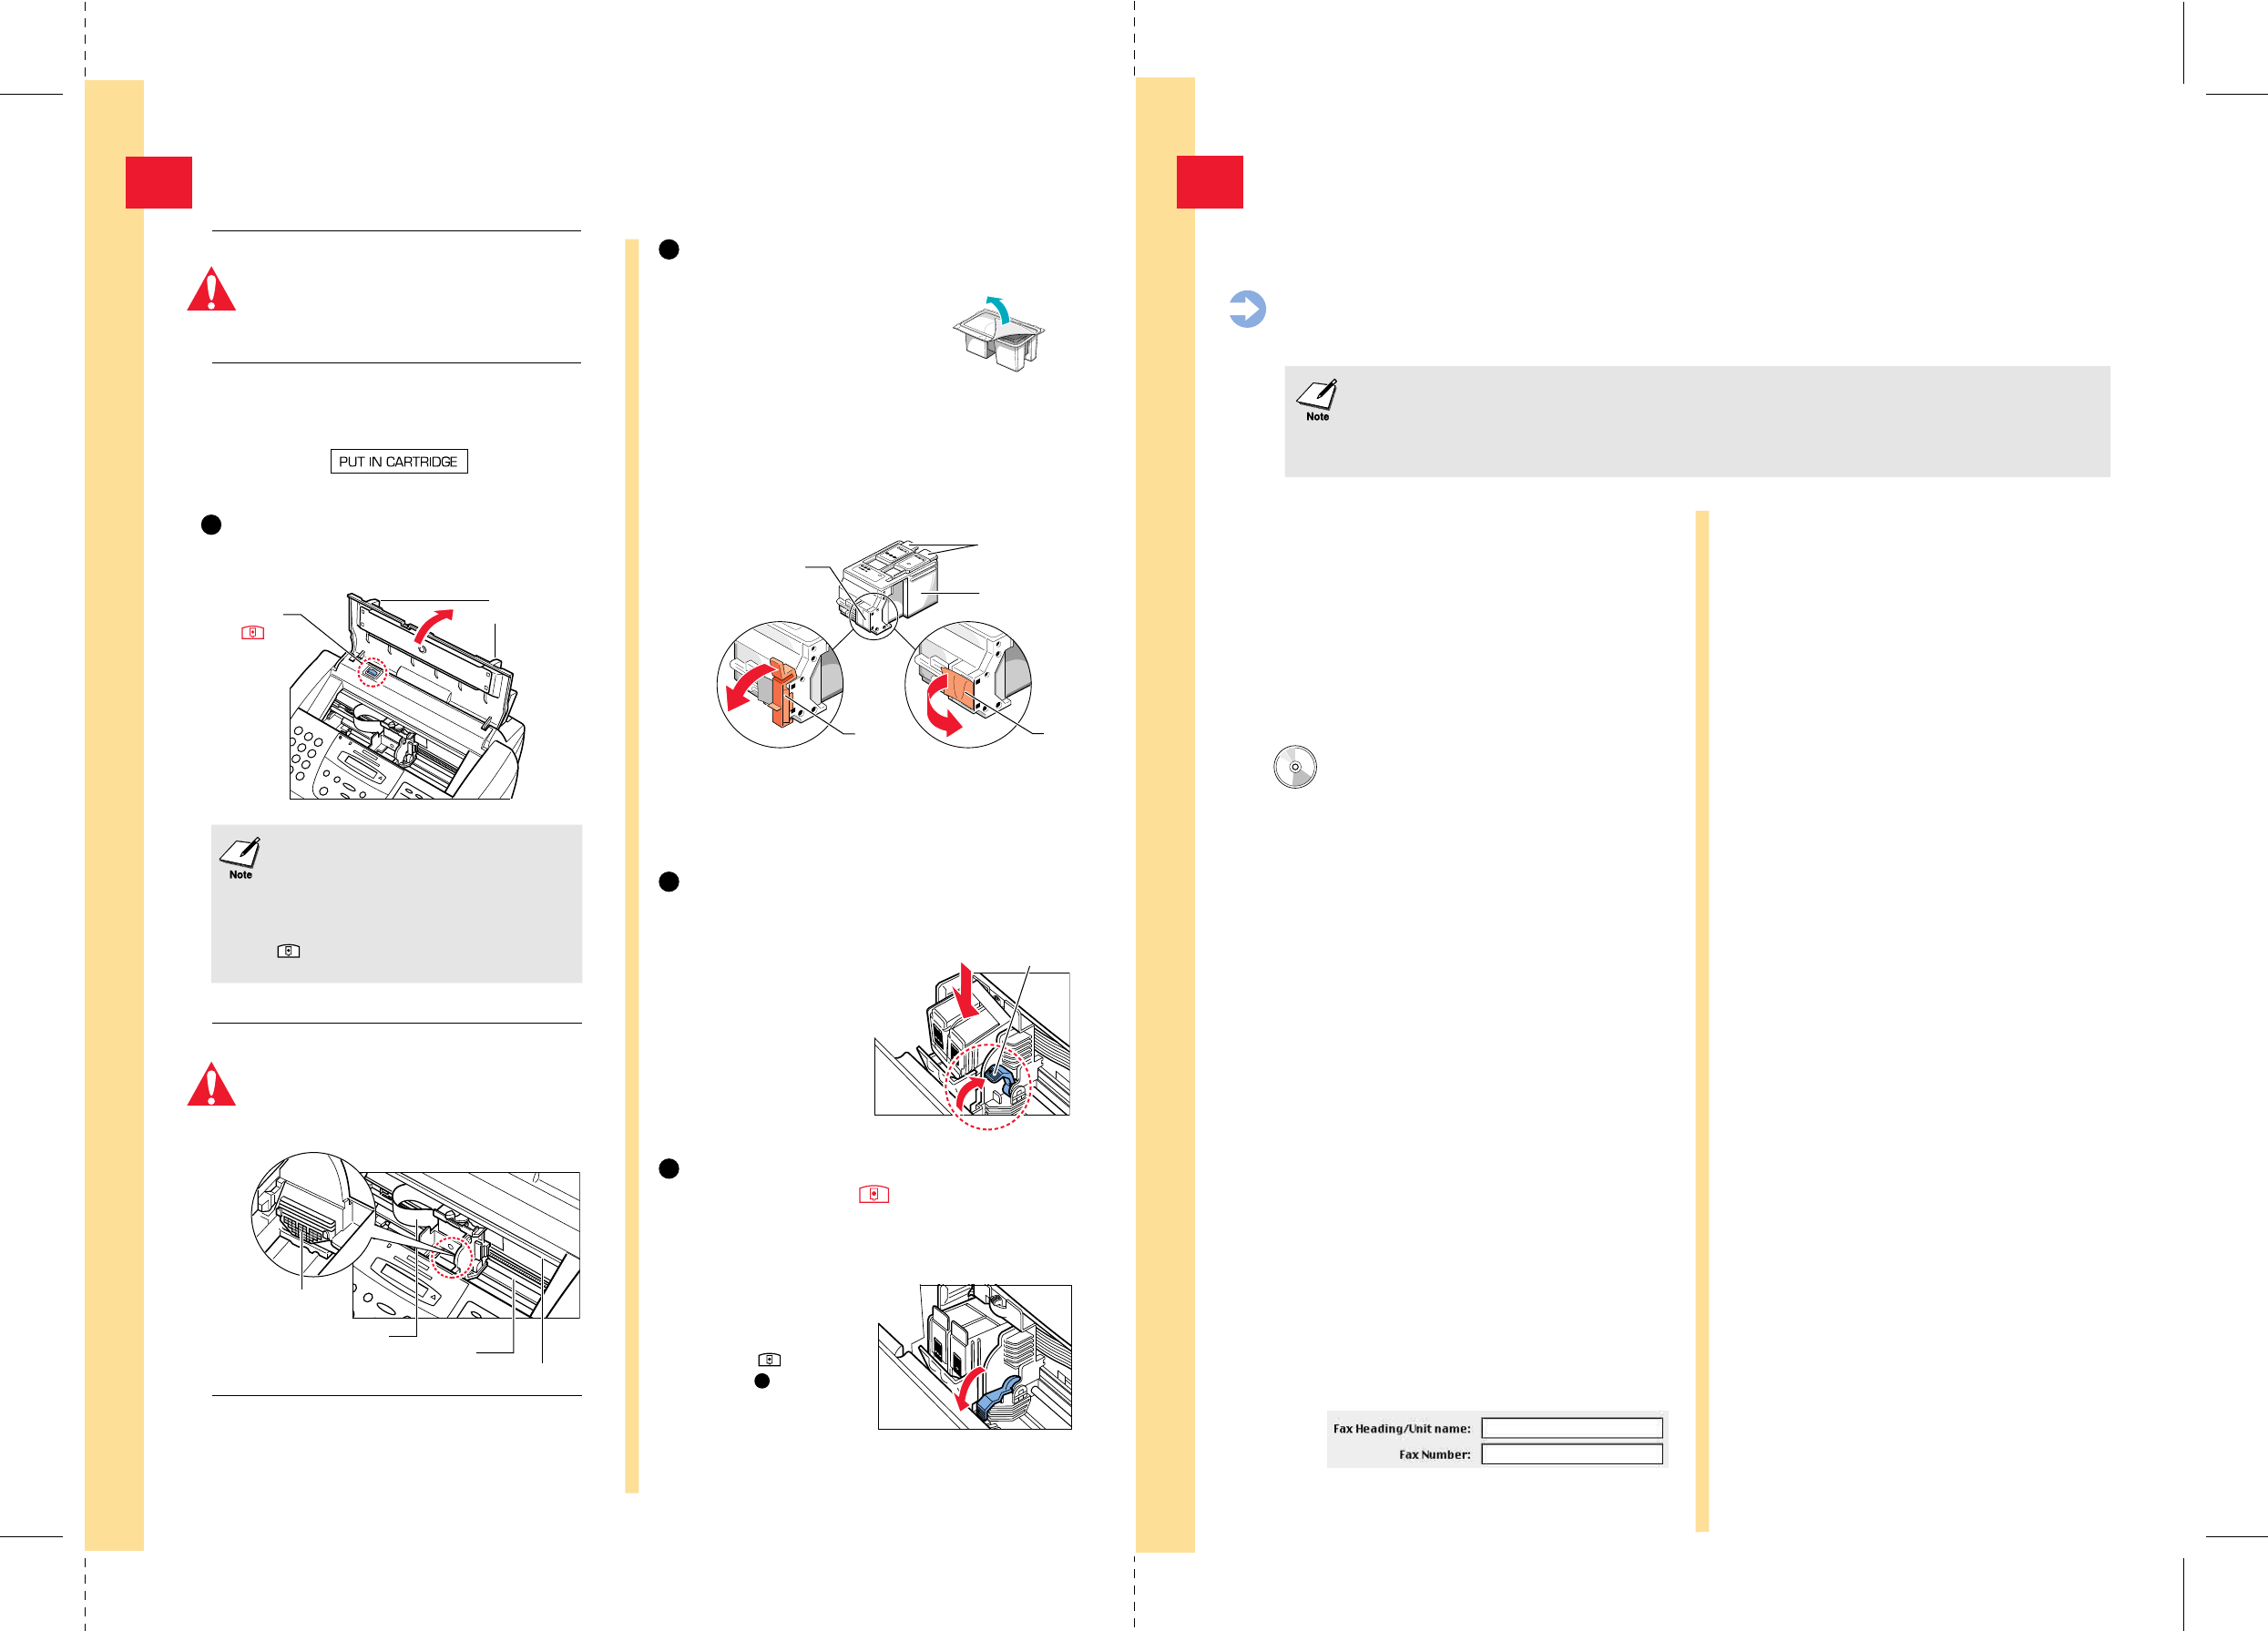
Install the Canon BJ® Cartridge
3
Remove the cap and tape from the
BC-21e Color BJ Cartridge.
2
Peel the clear plastic from the
BJ cartridge's protective packaging
and remove the cartridge.
Hold the BJ cartridge on the sides only. Do not touch
the silver plate on the bottom of the cartridge, or the
silver metal or circuit area on the side.
Make sure the BJ cartridge's print head is facing away
from you. Carefully remove the orange cap and then
pull the orange tape from the print head.
Caution
Spilled ink can stain any surface.
Open BJ cartridges and ink tanks very
carefully. See your User's Manual for
complete details on BJ cartridge and
ink tank maintenance.
Make sure the MultiPASS is plugged in.
The LCD reads:
Open the ADF.
1
Grasp both the document guides and lift up.
Document
Guide
Cartridge
Button
When you plug in the MultiPASS for the
first time, the cartridge holder moves to
the center of the unit so you can install the
BJ cartridge. If the cartridge holder is not
in the center, press the cartridge button
inside the unit.
Caution
Do not touch the ribbon cable, the small
circuit board, the guide rail, or the round
shaft. Touching these parts may adversely
affect operation of the unit and/or cause
print quality deterioration.
Ribbon Cable
Guide Rail
Round Shaft
Ink
Cartridge
BCl-21
Made in
Japan
Black
Ink
Cartridge
BCl-21
Made in
Japan
Color
Made in Japan
Color BJ
Cartridge
BC-
2
1e
Print Head
do not touch
Cap
Tape
Discard the cap and tape immediately. Never attempt
to re-attach the cap or tape to the print head; this may
adversely affect the ink flow or quality of the ink color.
Insert the BJ cartridge.
3
Ink
Cartridge
BCl-21
Color
Made in
Japan
Ink
Cartridge
BCl-21
Black
Made in
Japan
Raise the blue lock lever (on the right side of the
cartridge holder) to the up position.
Make sure the cartridge label
faces you and the print head
is down.
Carefully set the
BJ cartridge straight
down into the
cartridge holder.
Lower the lock lever and press the
cartridge button .
4
Make sure the cartridge is aligned against the back of
the holder, then press the blue lock lever down
completely.
The BJ cartridge locks
into position.
Press the button
(see step for location)
to move the cartridge
to its home position
on the right and close
the ADF. The MultiPASS cleans the print head,
which takes about one minute.
Ink
Cartridge
BCl-21
Color
Made in
Japan
Ink
Cartridge
BCl-21
Black
Made in
Japan
Circuit
Board
4
PAGE 4 (BACKS 7) PAGE 5 (BACKS 6)
BJ Cartridge
Ink Tanks
Lock Lever
CANON/MPC530/560 Q.S.G: Pages 4 & 5 - File: 560QS4-5.eps
Wendi Swanlund P.R. Correx> January 5, 2000
1
Install the MultiPASS C545 Software
Your MultiPASS C545 comes with a Setup program that makes installing the MultiPASS software easy and fast.
You install the MultiPASS C545 software from the MultiPASS C545 Installer CD.
Important! The MultiPASS must be plugged in and connected to your Macintosh. If you have a previous version of
the MultiPASS Desktop Manager software installed, you must remove it. See your online MultiPASS Desktop Manager
Software Guide for details.
Standalone Fax Users: If you plan to use the MultiPASS C545 as a standalone fax machine, you do not
need to install the MultiPASS Desktop Manager software. However, you do need to program your name
and fax number into the unit so that this information prints on faxes you send. You can also select a
Receive Mode for faxes you receive.
1. Make sure your computer is turned off.
2. Be sure the MultiPASS is plugged in
and connected to the computer.
3. Now turn on the computer.
Start up your system in this order:
1.
Insert the MultiPASS Canon Creative
CD into your CD drive. (This CD contains
all the device software for your MultiPASS.)
2. The MultiPASS Canon Creative screen
should appear automatically. (If not, double-
click the MultiPASS C545 icon that appears
in the CD window on your desktop. This will
launch the MultiPASS Canon Creative screen.)
3. Click the Install/Uninstall button on the
MultiPASS Canon Creative screen.
4. On the new screen that appears, click the
Install MultiPASS Software button. This will
install the MultiPASS Desktop Manager
software package. Follow the instructions on
screen. (You must accept the license
agreement in order for installation to proceed.)
5. When installation is complete, you will be
prompted to restart your computer.
6. After you restart, the Fax Setup Utility will
launch automatically. You will be prompted
to enter important information, which is
outlined in steps 7 and 8.
7. On the Send Fax tab of the Fax Setup Utility,
fill in your name in the Fax Heading/Unit
Name box. Fill in your fax number in the
Fax Number box.
When you see the Macintosh desktop, follow
these steps.
8. On the Receive Fax tab, select one of four
Receive Modes to determine how faxes are
received. For more information about these
Receive Modes, see Chapter 3, Using the Fax
Setup Utility in your Desktop Manager Software
Guide (click the Manuals/Supplies/Help button
on the Canon Creative screen, or double-click
the Desktop Software Guide icon in the
Desktop Manager folder on your hard drive).
9. Installation and setup of the MultiPASS
Desktop Manager software is now complete.
To install Canon Photo and TextBridge Pro:
1. Make sure the MultiPASS Canon Creative CD is
inserted into your CD drive. (Double-click the
MultiPASS C545 icon if the MultiPASS Canon
Creative screen does not appear automatically.)
2. Click the Install/Uninstall button on the
MultiPASS Canon Creative screen.
3. Click the Install Canon Photo button. Follow
the instructions that appear on the screen.
4. When installation is complete, click the Install
TextBridge Pro button.
5. After you finish installing Canon Photo and
TextBridge Pro, click the Plug-In Setup button.
6. Installation and setup of Canon Photo and
TextBridge Pro is now complete.
If you have Microsoft Office installed, you may
wish to install OfficeReady CC. You can do so at any
time by returning to the MultiPASS Canon Creative
CD, clicking the Install/Uninstall button, then clicking
the OfficeReady CC button.
To register your MultiPASS:
1. Return to the Canon Creative CD. Double-click
the MultiPASS C545 icon if the Canon Creative screen
does not appear automatically.
2. Click the Product Registration button to register
your MultiPASS C545. Follow the instructions.


