


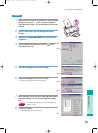
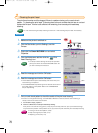
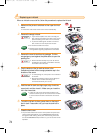

Make sure the printer is switched on.
Click the Start button, point to Settings, and click
Printers.
Right-click the Canon BJC-8200 icon and select
Properties.
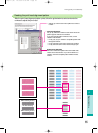
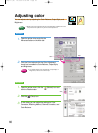
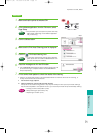
Click the Maintenance tab then click the (Print
Head Cleaning) icon.
• To start print head cleaning with the printer operation
panel, press down and hold the RESUME button until
you hear one beep then release it.
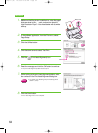
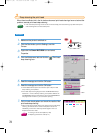
Read the message and click the OK button.
Read the message and click the OK button.
• The BJ Status Monitor opens automatically and closes when print
head cleaning is completed.
• The POWER/ERROR lamp flashes green for about 30 seconds until
print head cleaning is completed. Wait for the POWER/ERROR
lamp to stop flashing.
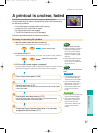
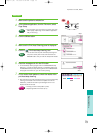
Print a nozzle check pattern to check the results of the print head cleaning.
• If there is no change after cleaning, use the BJ Status Monitor to check the amount of ink remaining, or
visually check the ink levels of the ink tanks.
1 If an ink tank is empty, replace it.
2 If there is sufficient ink, execute print head deep cleaning.
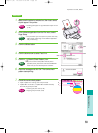
If the printer is not used for a long period, it may not print normally and even up to 5 print head cleanings
may not solve the problem. If this problem occurs, try to clean the print head with print head deep cleaning.
• Printing a nozzle check pattern (P.68)
• Deep cleaning the print head (P.72)
• Replacing an ink tank (P.74)
Reference
7.
6.
5.
Memo
4.
3.
2.
1.
Cleaning the print head
2
2
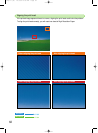
The print head nozzles could be clogged if there is a pattern missing on the nozzle check
pattern. Try cleaning the print head. If cleaning does not work, consider that ink has run out and
replace the ink tank. If there is still sufficient ink remaining, then execute print head deep
cleaning.
• Print head cleaning and deep cleaning consume ink. Avoid cleaning the print head unnecessarily.
Memo
Windows
ON
70
Click!
Click!
Click!
chap-4 (E) 10/2/99 6:33 AM Page 70