


35
MCI MODE
WRITE DATA INTO THE MEMORY CARD
ACCESS TO THE MEMORY CARD THROUGH THE PROJECTOR
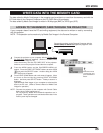
If your computer doesn't have the PC card writing equipment, the data can be written or read by connecting
with this projector.
NOTE : This operation can be made only by Media Card Imager in the Personal Computer.
The data edited by Media Card Imager in the computer can be written to or read from the memory card with the
PC Card drive of your Personal Computer or the PC CARD Slot of this projector.
The data edited by Media Card Imager is written in Bit Map type (BMP) or JPEG type (JPG).
NOTE : Connect the projector to the computer with Control Cable
before turning those appliances on.
Do not press any button while read/write operations are in
progress. Those operations are canceled and the data in the
memory card may be damaged.
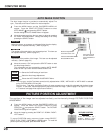
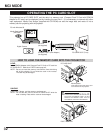
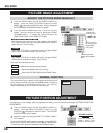
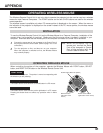
Connect the projector to the Personal Computer with the
Control Cable for Serial Port
(optionally supplied / refer
to page 12, 13).
Connect the projector to your computer with the Control Cable
for Serial Port (optionally supplied). (Refer to “CONNECTING
COMPUTER” on Page 12, 13.)
Insert the memory card into PC CARD SLOT of the projector.
And then, turn on the projector first and then the computer.
1
2
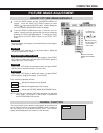
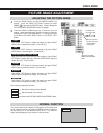
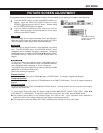
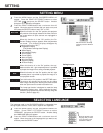
Press the MENU button and the ON-SCREEN MENU will
appear. Press the POINT LEFT/RIGHT buttons to select VIEW
and press the SELECT button. Another dialog box VIEW
SETTING menu will appear.
3
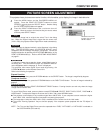
Press POINT DOWN button and a red arrow will appear. Move
the arrow to Card access by pressing POINT UP/DOWN
button. And then press SELECT button. “Ready to access” is
displayed.
Operate Media Card Imager of your computer to write/read the
data in the PC card. (Refer to Owner's Manual of Media Card
Imager for operation.)
Move the arrow to
“Card access” and
press the SELECT
button.