


9
Part Names and Functions
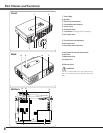
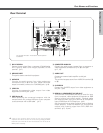
A built-in micro processor which controls this unit may occasionally
malfunction and need to be reset. This can be done by pressing the RESET
button with a pen, which will shut down and restart the unit. Do not use the
RESET function excessively.
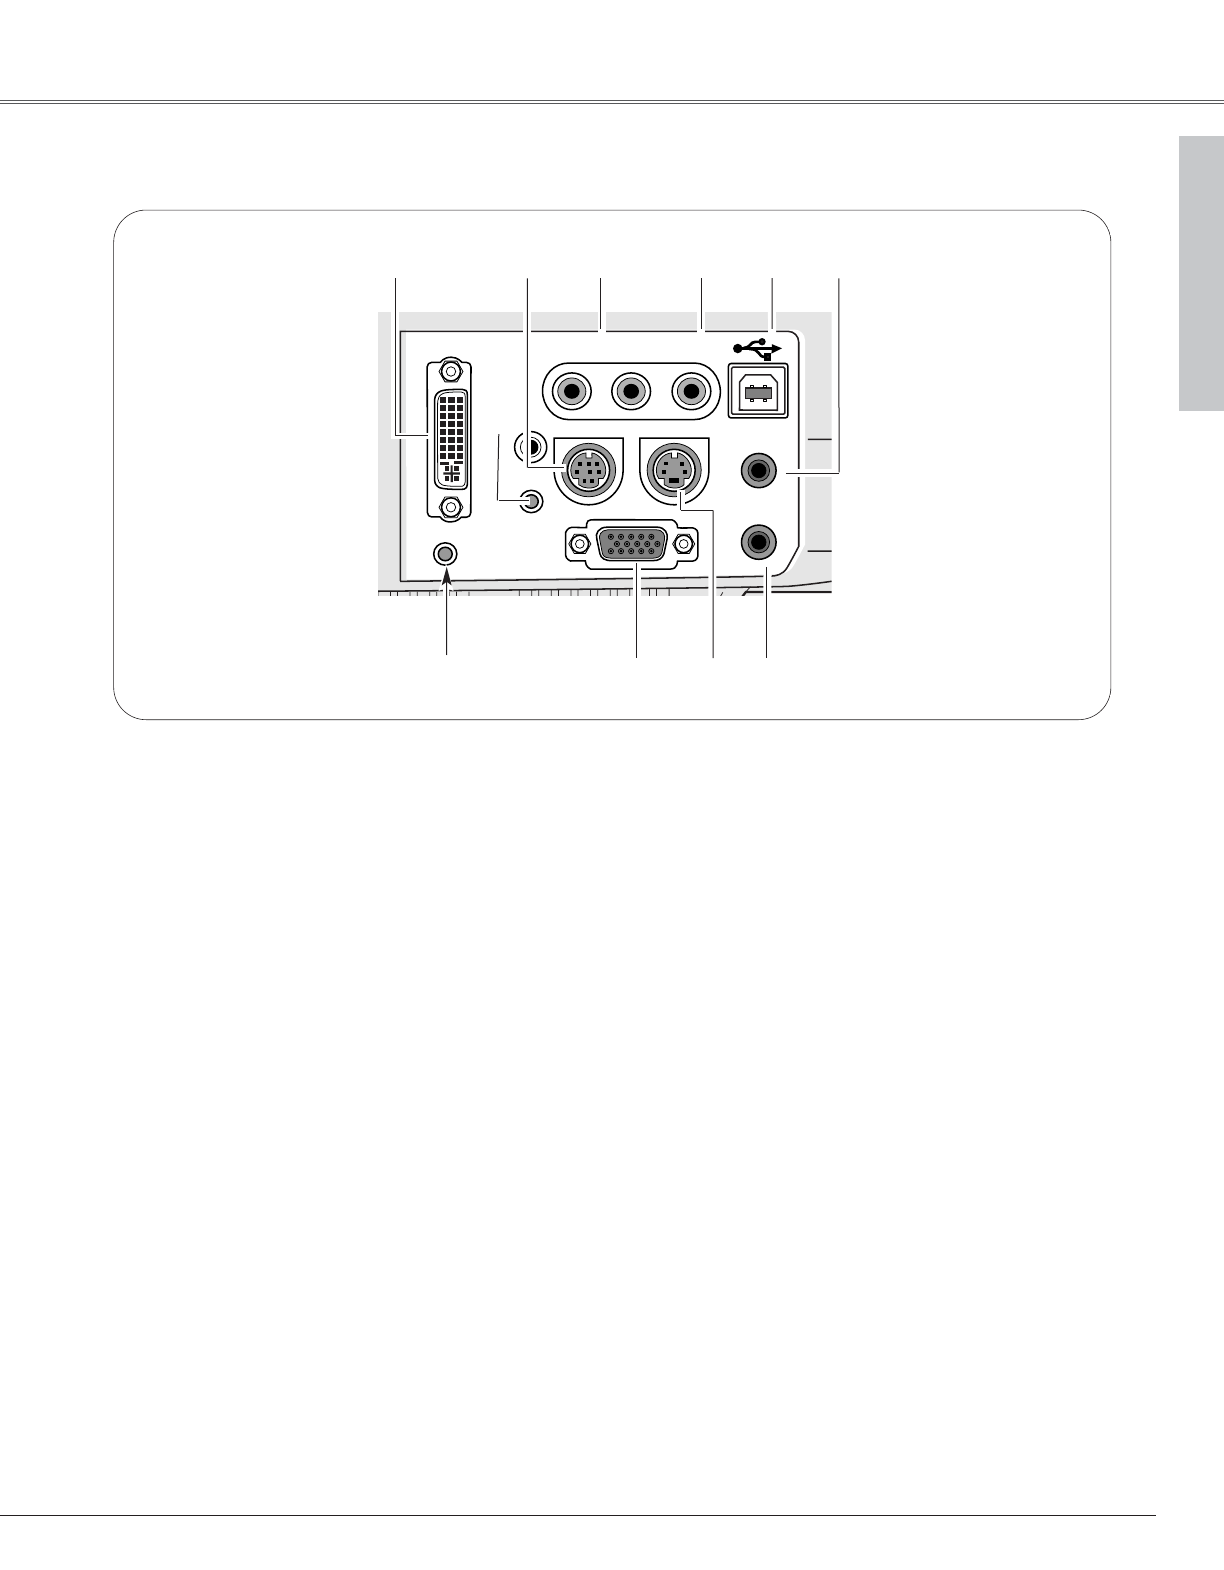
Rear Terminal
IN
DVI - I /
RGB IN-1
RGB OUT
S-VIDEO IN
RGB IN-2 /
COMPONENT IN /
COMPUTER
AUDIO
AUDIO IN
R VIDEO INL
SERVICE PORT
RESET
MCI
AUDIO OUT
q
w
e
r
t y
o i u
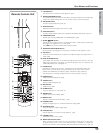
i S-VIDEO IN
Connect the S-VIDEO output from video equipment to
this jack. (p18)
e AUDIO IN
Connect the audio output from video equipment
connected to r or i to this jack. (When the audio
output is monaural, connect it to L (MONO) jack.) (p18)
y COMPUTER AUDIO IN
Connect the audio output (stereo) from a computer or
video equipment connected to q or o to this jack.
(p 17, 19)
r
VIDEO IN
Connect the composite video output from video
equipment to VIDEO jack. (p18)
o RGB IN-2/ COMPONENT IN/ RGB OUT
This terminal is switchable and can be used for input
from a computer, video equipment (Component or RGB
Scart) or output to the other monitor. Optional cables
are required when using this terminal as component
input or RGB Scart 21-Pin Video input. (p61)
Set the terminal up as either Computer input or Monitor
output properly. (Used for Monitor out, this terminal
outputs only incoming signal from DVI-I/ RGB IN-1
terminal.) (p17, 19, 44)
u AUDIO OUT
Connect an external audio amplifier to this jack.
(p17- 19)
This terminal outputs sound from AUDIO IN terminal (e
or y).
t USB (Series B)
When operating the connected computer with the
remote control unit, connect USB port of your computer
to this connector with a USB cable. (p17)
w SERVICE PORT
This jack is used to service this projector.
✽
Part Names and Functions
✽
Do not press this button. This button is used for optional
accessories.
q DVI-I/ RGB IN-1
Connect output signal from a computer (Digital/Analog
DVI-I type) or Multi Card Imager (optional) to this
terminal. (p17)