


21
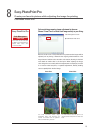
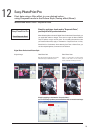
Margin Setting Method 3
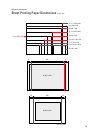
Set Print Size Function of [Margins]
This method allows you to adjust the amount of margin just like when you
use an easel mask. The original photograph's size and position are fixed to
allow you to trim the photograph by increasing the size of the margin. This is
a convenient feature for setting margin amounts while maintaining the
composition of the original photograph.
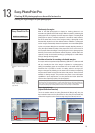
[Example of application to A3 size paper (420 mm x 297 mm)]
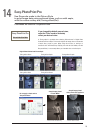
1. Use Layout to select [Bordered (full)], then click on the [Trimming] button.
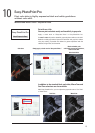
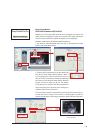
First, set the composition using the trimming screen. Easy-PhotoPrint Pro
provides a trimming feature that applies the concept of the Rule of Thirds.
Imagine those times when you only had an instant to get a shot, or when
there was no time to compose the image for a professional-looking shot, or
the shot was preset for a margin. This method enables you to trim such
photographs to easily compose the final photograph with a professional
looking balance.
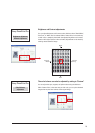
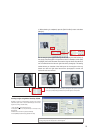
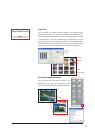
Dotted lines that split the photograph into three sections vertically and horizontally appear on the trimming screen that
uses the Rule of Thirds concept. Drag an intersecting point to simultaneously shrink and move the trimming range of the
photograph. (See above.) The intersecting point at the top portion can move to a position near the subject's face. The
screen widens to allow for extra space in the direction which the subject is facing.
Easy-PhotoPrint Pro
Bordered (full)
Trimming Button
Drag the intersecting point on the upper right to
a position near the subject's face.
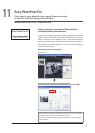
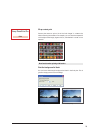
B/W Print with Margins