


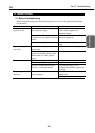
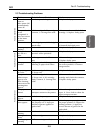

2.3 Troubleshooting Problems
2-9
S600
Part 2: Troubleshooting
Troubleshooting
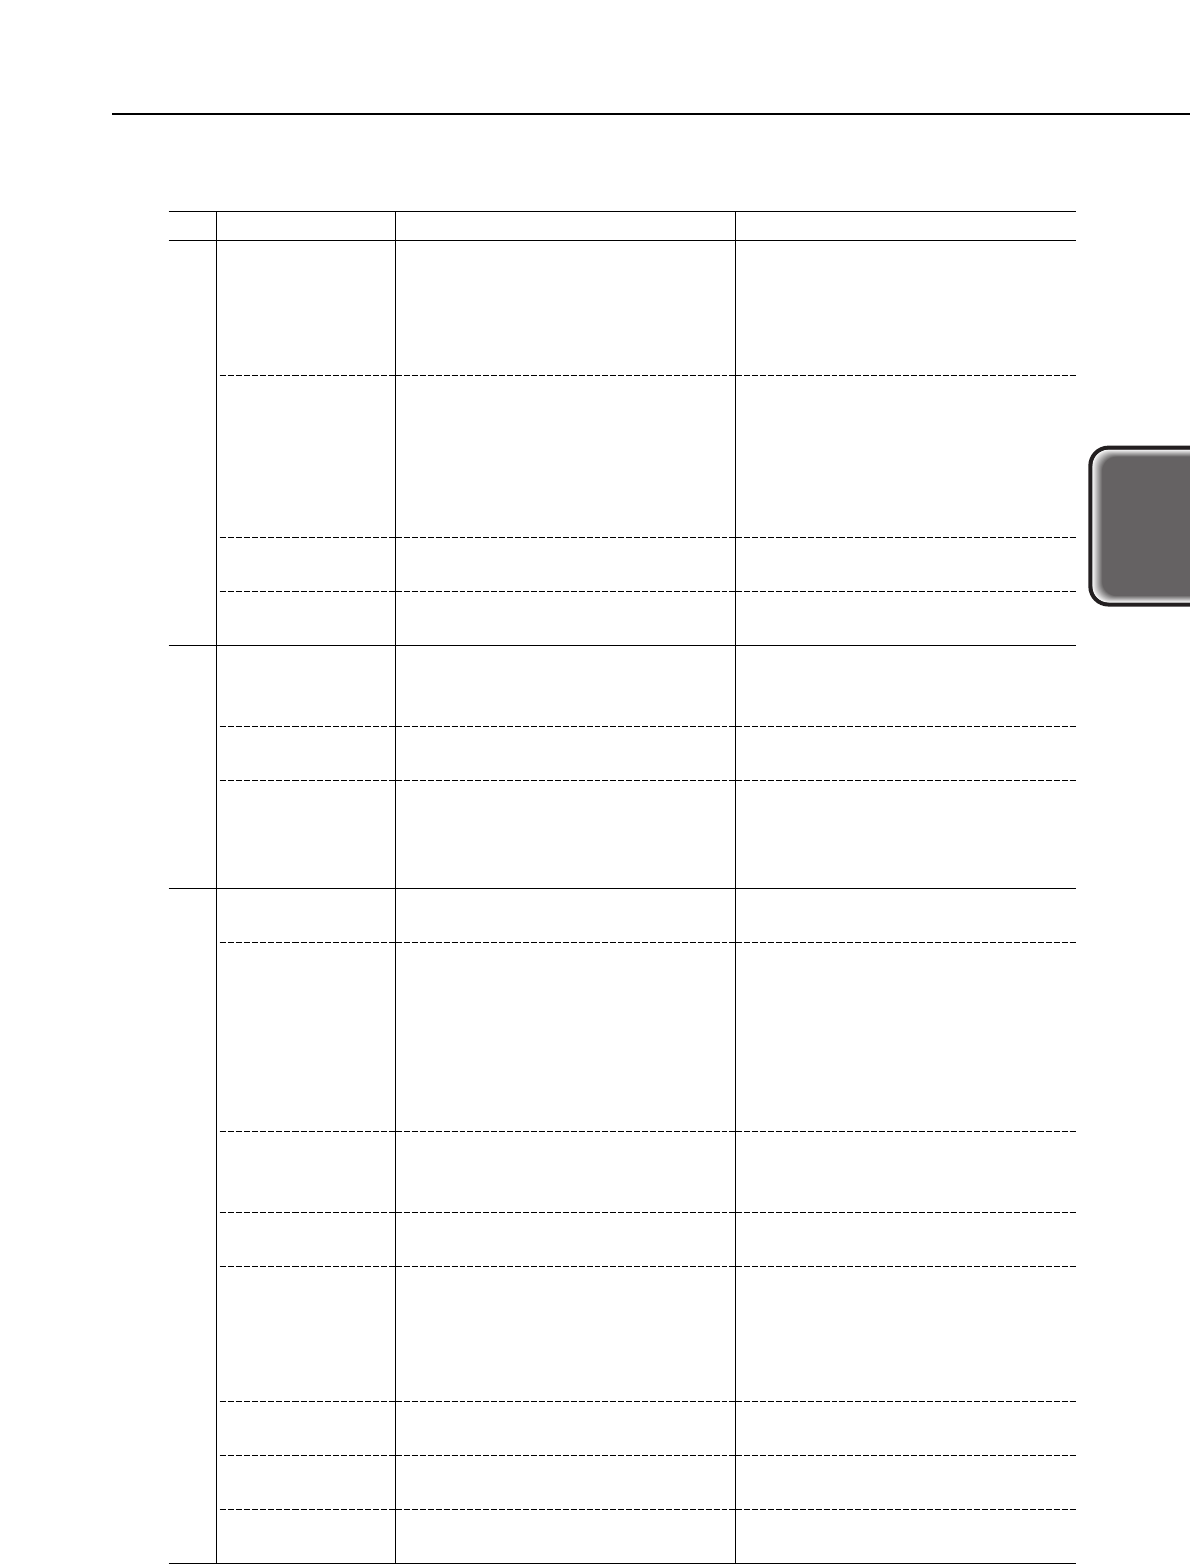
Problem
Power does not
turn on.
After power ON,
it immediately
turns off.
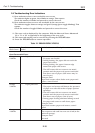
The print head
is not
recognized. It
does not return
to the home
position.
Abnormal noise.
Printing stops
midway.
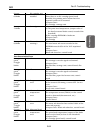
Multiple sheets
are fed at a
time.
Paper is not fed.
The paper is
slanted.
No printing.
No color.
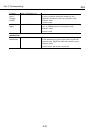
Scrape marks or
white stripes
appear even
after cleaning.
Lines not in the
printing data
appear.
The paper is
dirtied.
Spur marks
appear.
Broken vertical
lines appear.
Lines are
missing.
Strange color
tones.
Overlapping
printing
Probable Cause / Check Items
1. AC adapter, 2. Logic board
1. BJ cartridge, 2. BJ cartridge
contacts, 3. Carriage flex cable
1. Dislodged parts, 2. Dislodged
pinch roller.
1. Control board
1. ASF (Return tab, faulty
pressure roller operation)
1. Foreign matter, 2. PE sensor
arm
1. Paper guide, 2. Foreign matter
adhering to paper feed rollers
1. BJ cartridge, 2. Ink tank,
3. Purge unit
1. BJ cartridge, 2. Ink tank,
3. Purge unit, 4. BJ cartridge
faulty contacts, 5. Carriage flex
cable
1. Ink mist from the paper
transport section in the printer.
1. Deformed spur tips.
1. Paper spacing lever position
not properly set. 2. Improper
amount of grease applied on
guide shaft.
1. Ink tank
1. BJ cartridge
1. Platen unit (eject roller)
Faulty OperationFaulty Paper Feed
Faulty Printout
Solution
1. Replace faulty parts.
1. Remove and reinstall the BJ
cartridge. 2. Replace faulty parts.
1. Remove foreign matter,
2. Reinstall dislodged parts.
1. Replace faulty parts.
1. Replace faulty parts.
1. Remove foreign matter,
2. Replace faulty parts
1. Readjust the paper guide to
the correct position, 2. Remove
foreign matter.
1. Replace faulty parts.
1. Remove and reinstall BJ
cartridge and check the contacts,
2. Replace faulty parts.
1. Pass through several sheets of
paper. 2. Use a cloth to clean the
paper transport section.
1. Replace faulty parts.
1. Set the paper spacing lever to
the proper position. 2. Adjust the
printing position. 3. Apply the
correct amount of grease on the
guide shaft.
1. Replace ink tank.
1. Replace faulty parts.
1. Replace faulty parts.