E-11
Text Effects
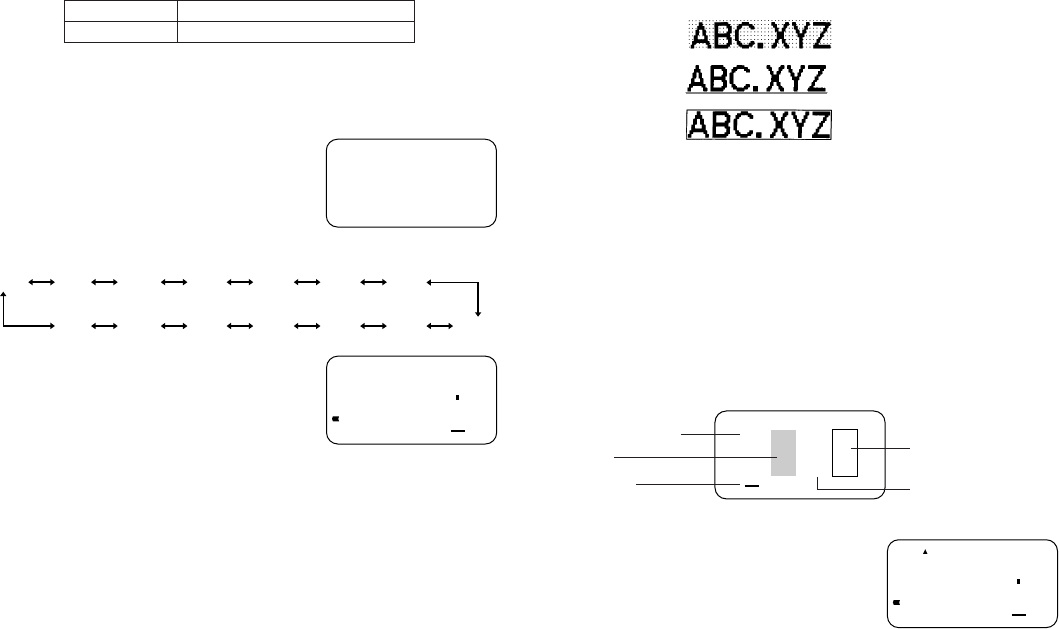
There are three text effects that you can assign: shading, underlining, and boxed
text. The following shows examples of each.
Shading:
Underlining:
Boxed Text:
Text effect changes are applied to printed text only. The appearance of the
displayed text does not change, but the text effect indicators will show you when
a text effect is being used.
Important!
• Any text effect specification you make is applied to all the characters on the
display. You cannot make multiple specifications for specific characters.
• Underlining and boxed text may overlap with some characters.
• Due to overlapping of the two effects, underlining is not visible if you use it in
the same line as boxed text.
To specify a text effect
1. Input the text.
2. Press EFFECT to display a menu of text effects.
—
3. Use H and J to move the cursor to the effect you want to use.
4. When the cursor is located under the effect you
want to specify, press SET to select it and re-
turn to the text display.
Note
• You could also perform the above procedure in reverse, specifying the text
effect first and then inputting the text.
Note that you cannot input a B symbol if you are using 6mm wide tape.
• The Label Printer automatically adjusts the character size whenever you de-
lete a B symbol to change a two-line label to a 1-line label.
To change the character size
Example: To input “ABXYZ” as 2×2 characters.
1. Input the text.
2. Press SIZE to display the current character size
setting.
3. Use H and J to change the displayed size in the following sequence.
1×11×21×32×12×22×3
2×32×22×11×31×21×1
AUTO
AUTO
4. When the character size you want to specify is
on the display, press SET to select it and return
to the text display.
Note
• You could also perform the above procedure in reverse, specifying the char-
acter size first and then inputting the text.
AUTO
Initial Size Size After Delete of
BB
BB
B
AUTO 2×2
XYZ
Box
Underline
Normal (no effects)
Shading
Cursor
XYZ


