


10
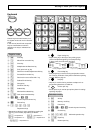
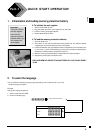
Part-1 QUICK START OPERATION
E
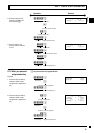
5 Remove the journal paper from the
take-up reel.
6 Press the printer open key and open
the platen arm.
7 Remove the core of the paper.
8 Load new paper following the instruc-
tions “1. To load journal paper”.
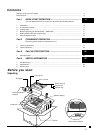
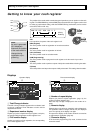
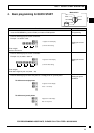
3. Loading paper roll
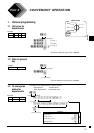
Mode switch to REG
CAL
REG
OFF
RF
PGM
X
Z
REG
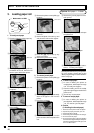
1. To load journal paper
1 Pressing down the printer open key.
2 Open the platen arm.
3 Ensuring the paper is being fed from
the bottom of the roll, lower the roll
into the space behind the printer.
4 Put the leading end of the paper over
the printer.
5 Close the platen arm slowly until it
locks steadily.
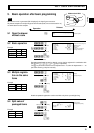
◗ To load receipt paper
1 In case of defining the printer as
receipt printer, follow steps 1 through
5 of “To load journal paper”.
2 Pass the leading end of the receipt
paper through the paper outlet of the
printer cover.
3 Tear off any excess paper.
◗ To remove receipt paper
1 In case of defining the printer as
journal printer, follow steps 6 through
7 of “To remove a journal paper”.
◗ Caution
(in handling the thermal paper)
1. Never touch the printer head and platen.
2. Unpack the paper just before your use.
3. Avoid heat/direct sunlight.
4. Avoid dusty and humid places for storage.
5. Do not scratch the paper.
6. Do not keep the paper under the following
circumstances: High humidity and tempera-
ture/direct sunlight/contact with glue, thin-
ner or a rubber eraser.
Default printer definition is journal printer.
To print receipts, please refer to the
“Basic programming for QUICK START”
on the next page.
Options:Roll paper ••• P-5880T
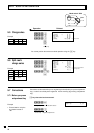
6 Remove the printer cover by lifting up
the back.
7 Roll the paper onto the take-up reel a
few turns.
8 Set the left plate of the take-up reel
and place the reel into the register.
9 Press the l key to take up any
slack in the paper.
0 Replace the printer cover slowly.
2. To remove journal paper
1 Remove the printer cover by lifting up
the back.
2 Press the l key until approximately
20cm of the paper is fed from the
printer.
3 Cut off the roll paper.
4 Remove the take-up reel from the
printer and take off the left plate of the
reel.
platen arm
printer cover