


E
22
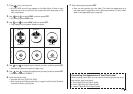
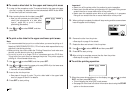
■ To create a disc label for the upper and lower print areas
1. In step 4 of the procedure under “To create a label for the upper print area
of a disc” on page 19, select the icon that shows both AREA A and AREA
B, and then input text into both areas.
2. After inputting the text for the label, press SET.
• Now you can preview your disc label (“To
check the appearance of a disc label
layout”, page 20) or print it without
previewing (see below).
3. Use and to select PRINT, and then
press SET.
■ To print a disc label in the upper and lower print areas
Note
• It is recommended that you print on a disc before you record anything on it.
Note that CASIO COMPUTER CO., LTD. will not be held responsible for any
data that is lost during printing.
• Before printing, be sure to check the “Printing Precautions” and make sure
the disc you are about to print on is acceptable.
• Do not try to print on a single CD-R or a business card size CD-R disc.
Tr ying to print on such discs can damage the printer. This printer supports
printing on 12cm diameter discs only.
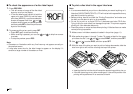
1. Use
and
to select DISC, and then press SET.
2. Use
and
to select the upper print area (AREA A) or the lower area
(AREA B), and then press SET.
• Here we will select AREA A.
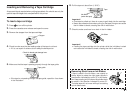
3. Insert a disc into the printer.
• See steps 4 through 6 under “To print a disc label in the upper label
area” on pages 20 and 21 for details.
4. Press SET to start printing.
Important!
• Never turn off the printer while it is performing a print operation.
• Never touch the disc while a print operation is in progress. Doing so can
scratch the disc or cause malfunction of the printer.
• Never open the cassette cover while a print operation is in progress.
Doing so can scratch the disc or cause malfunction of the printer.
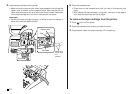
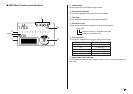
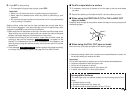
5. When printing is complete, the disc will stop moving and the screen shown
here will appear on the display.
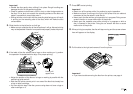
6. Remove the disc from the printer.
• See step 9 on page 21 for details.
7. Rotate the disc and reinsert it into the printer.
8. Use
and
to select AREA B and then press SET.
9. Press SET to start printing.
10.After printing is complete remove the disc from the printer.
• See step 9 on page 21 for details.
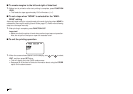
■ To exit the printing operation
1. When the screen shown above is on the display, use and
to select
EXIT, and then press SET twice.
• This will display the initial DISC mode screen.
• See page 54 of the User’s Guide for information about using the STORE
option on the above screen.