Operation
OVATION™ F-95WW User Manual Rev. 2 -13-
Reset
To reset the OVATION™ F-95WW to the factory default settings, follow the instructions
below.
1. Go to the SET main level.
2. Select the REST programming level and then the display becomes blank.
Enter the passcode as described in Passcode
. After successfully entering the
passcode, REST blinks on the display during the reset process.
3.
OK
appears on the display when finished.
Performance Power
Output Options
The OVATION™ F-95WW offers three power output options during the cooling of the
fixture’s LEDs.
1. Go to the SET main level.
2. Select the PERF programming level.
3. Select from the following options:
· Select LIVE to cool the LEDs by balancing the use of the fan and the power
output level.
· Select STDO to cool the LEDs by maintaining the use of the fan and limiting the
power output level.
· Select POWR to cool the LEDs by maintaining the use of the fan and allowing
full power output.
Manual Zoom Control
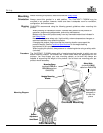
The OVATION™ F-95WW has a 10° to 54° manually controlled zoom range. Adjust the
zoom angle as follows.
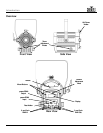
· Locate the zoom adjustment knobs on either side of the OVATION™ F-95WW and
turn the knobs to increase or decrease the zoom angle.
Master/Slave Mode
The Master/Slave mode allows a single OVATION™ F-9
5WW (the “master”) to control
the actions of one or more OVATION™ F-
95WW units (the “slaves”) without the need of
a DMX controller to control the slaves. The master will be set to operate in Master mode
(MAST), while the slaves will be set to operate in Slave mode (SLAV
). Once set and
connected, the slaves will operate in unison with the master.
Configure the units as indicated below.
The Slaves:
1.
Go to the RUN main level.
2. Select SLAV.
3. Connect the DMX input of the first slave to the DMX output of the master.
4. Connect the DMX input of the subsequent slaves to the DMX output of the previous
slave.
5. Finish setting and connecting all the slaves.
The Master:
1.
Go to the SET main level.
2. Select the MCON programming level.
3. Select MAST.
Note: If you select SELF, no DMX signals are sent to the slaves.
4. Make the master the first product in the DMX daisy chain.
5. Control the master using the DMX controller and the slaves will operate in unison.
Do not connect a DMX controller to the products configured for slave operation.
The DMX controller may interfere with signals from the master.


