


23
Setting Up: Advanced
Linksys E-Series
4.
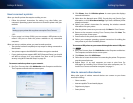
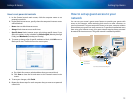
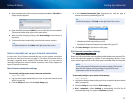
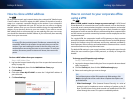
Open a web browser on the computer and open the address 192.168.1.1.
A login window appears.
5.
Enter the default password (admin). (You can leave the user name blank.)
The browser-based utility opens to the main menu.
6.
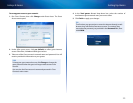
After you finish changing settings, click Save Settings at the bottom of
the screen.
7.
To exit the browser-based utility, close the web browser window.
TIP
For field descriptions, click Help in the right side of the screen.
How to manually set up your Internet connection
In most cases, Cisco Connect automatically sets up your Internet connection
(see “How to start Cisco Connect” on page 11). For some ISPs (Internet Service
Providers), especially those outside of the United States, you may need to
manually configure your router’s Internet connection. Your router supports six
types of Internet connections.
Basic Internet connection settings
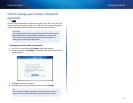
To manually configure your router’s Internet connection:
Setup > Basic Setup
1.
Log into the browser-based utility (see “How to open the browser-based
utility” on page 22).
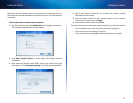
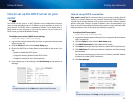
2.
Click the Setup tab, then click the Basic Setup page.
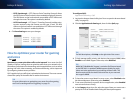
3.
In the Internet Connection Type drop-down list, click the type of
Internet connection provided by your ISP.
TIP
For field descriptions, click Help on the right side of the screen.
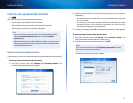
• Complete the fields required by your ISP.
• Complete the Optional Settings only if required by your ISP.
4.
Click Save Settings at the bottom of the page.
IPv6 Internet connection settings
For
E1500 E2500 E3200 E4200
IPv6 is a new IP protocol that uses simplified packet headers and requires IPSec.
It also has improved support for mobile IP and computing devices. If your
router model supports IPv6, an IPv6 Setup page is available under the Setup tab.
NOTE
To use your router’s IPv6 Internet connection settings, IPv6 service
from your ISP (Internet service provider) is required. For more
information on this service, ask your ISP.
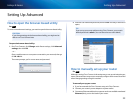
To manually configure your router’s IPv6 settings:
Setup > IPv6 Setup
1.
Log into the browser-based utility (see “How to open the browser-based
utility” on page 22).
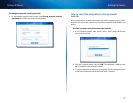
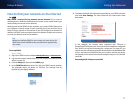
2.
Click the Setup tab, then click the IPv6 Setup page.
3.
IPv6 - Automatic—Select Enabled to automatically use IPv6 for all
network addressing. This option is Disabled by default.