


5
Catalyst 6509-NEB Switch and Cisco OSR-7609 Router Upgrade Note
78-16162-02
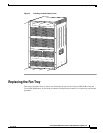
Replacing the Panel Safety Cover
Warning
This unit might have more than one power supply connection. All connections must be removed to
de-energize the unit.
Statement 1028
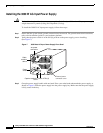
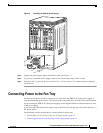
Step 2 Depending on how your system is powered, perform one of the two sets of substeps below.
AC-Input Systems
a. Turn the power switch to the Off (0) position on each power supply. Turning the power switch off
also disengages a pawl that unlocks the power supply from the chassis.
b. Disconnect the power cord from the power source.
c. Loosen the screw on the cable retention device, and disconnect the power cord from the power
supply being removed.
Note The AC power cord for the 4000 W power supply is hard wired and cannot be removed from
the supply.
Warning
Before performing any of the following procedures, ensure that power is removed from the DC circuit.
Statement 1003
DC-Input Systems
a. Verify that power is off to the DC circuit for each power supply. As an added safety precaution, you
should secure the source DC circuit breaker switch in the OFF position with electrical tape.
b. Turn the power switch to the Off (0) position on each power supply. Turning the power switch off
also disengages a pawl that unlocks the power supply from the chassis.
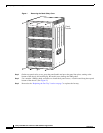
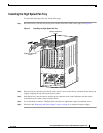
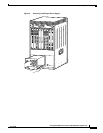
Replacing the Panel Safety Cover
This section describes how to remove and install the panel safety cover for the Catalyst 6509-NEB
switch and Cisco OSR-7609 Router. A number 1 Phillips-head screwdriver is required to perform this
procedure.
Caution Always use an ESD wrist strap when handling modules or coming into contact with internal components.
Warning
Hazardous voltage or energy is present on the backplane when the system is operating. Use caution
when servicing.
Statement 1034
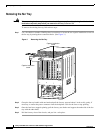
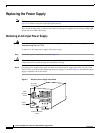
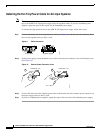
To remove the panel safety cover, perform these steps:
Step 1 Use a number 1 Phillips-head screwdriver to remove the 8 panel screws, 4 each located along the top and
bottom of the chassis. (See Figure 1.) Set the screws aside.
Step 2 Grasp the panel handle and pull the panel away from the chassis.