


Status and Statistics
Managing RMON
21 Cisco Small Business 300 Series Managed Switch Administration Guide
2
To enter RMON control information:
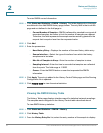
STEP 1 Click Status and Statistics > RMON > History. The fields displayed on this page
are defined in the Add RMON History page, below. The only field is that is on this
page and not defined in the Add page is:
• Current Number of Samples—RMON is allowed by standard to not grant all
requested samples, but rather to limit the number of samples per request.
Therefore, this field represents the sample number actually granted to the
request that is equal or less than the requested value.
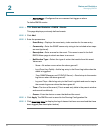
STEP 2 Click Add.
STEP 3 Enter the parameters.
• New History Entry—Displays the number of the new History table entry.
• Source Interface—Select the type of interface from which the history
samples are to be taken.
• Max No. of Samples to Keep—Enter the number of samples to store.
• Sampling Interval—Enter the time in seconds that samples are collected
from the ports. The field range is 1-3600.
• Owner—Enter the RMON station or user that requested the RMON
information.
STEP 4 Click Apply. The entry is added to the History Control Table page
,
and the Running
Configuration file is updated.
STEP 5 Click History Table to view the actual statistics.
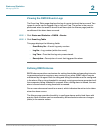
Viewing the RMON History Table
The History Table page displays interface-specific statistical network samplings.
The samples were configured in the History Control table described above.
To view RMON history statistics:
STEP 1 Click Status and Statistics > RMON > History.
STEP 2 Click History Table.
STEP 3 From the History Entry No. list, select the entry number of the sample to display.