


E
N
G
L
I
S
H
3.2 Ribbon Installation (CLP 2001, 6001, 6002, 6401)
CAUTION Be careful of the edges of the plates so injury or
property damage is possible.
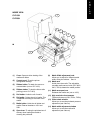
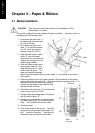
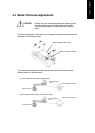
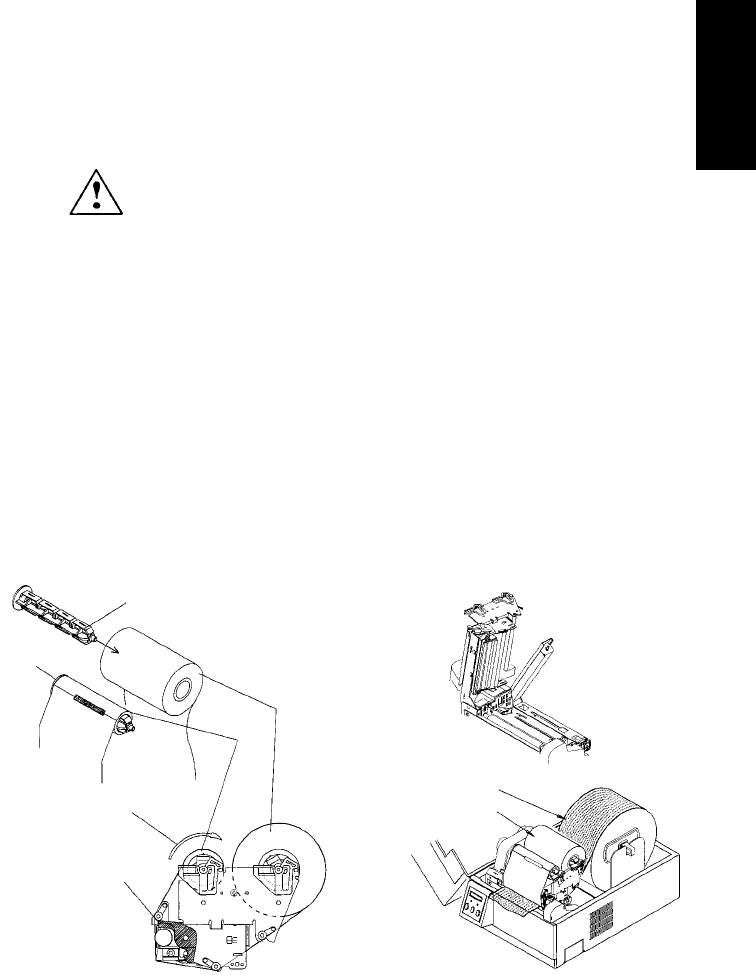
After opening the cover, install the ribbon as follows:
1 Push down the open lever ① to move the print head out of the way.
2 Insert the ribbon shaft ⑪ in the roll ribbon so that it is in its deepest position.
Then set it in the ribbon holder as shown in the figure.
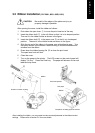
3 Insert the ribbon shaft
⑫
in the paper core
⑬
so that it is in its deepest
position. Then set it in the ribbon winder as shown in the figure.
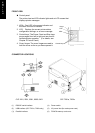
4 Stick the top end of the ribbon to the paper core with adhesive tape. Turn
the ribbon winder in the direction ribbon winding to remove slackness and
wrinkles from the ribbon.
5 Press down the ribbon bearing flat
⑩
to close the print head.
The open lever hook will lock.
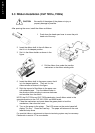
6 Close the cover.
7 Turn on the power to the printer. The LCD screen on the control panel will
display "On line." Press the Feed key. The paper will advance to the next
label and stop there.
After installing the ribbon, you may need to make some adjustments to the ribbon tension
settings. Please refer to section 3.6 for more details.
①
⑪
Ribbon
⑫
⑬
Print head opened
Roll paper
Ribbon
Direction of ribbon winding
Completion of setting paper and ribbon