


Removal and Replacement Procedures
Maintenance and Service Guide 5–7
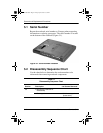
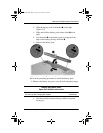
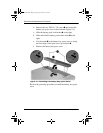
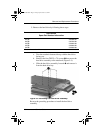
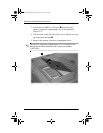
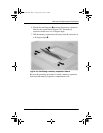
5. Remove the hard drive by following these steps:
a. Turn the notebook bottom side up with the hard drive
facing you.
b. Remove the four TM2.5 × 7.0 screws
1 that secure the
hard drive assembly to the notebook (Figure 5-4).
c. Slide the hard drive assembly forward
2 and remove it
from the hard drive bay.
Figure 5-4. Removing the Hard Drive Assembly
Reverse the preceding procedure to install the hard drive
assembly.
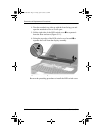
Hard Drives
Spare Part Number Information
80 GB
60 GB
40 GB
30 GB
20 GB
320038-001
316744-001
310645-001
310644-001
310643-001
Hard drive carrier with connector 310733-001
307503-003.book Page 7 Friday, April 4, 2003 3:37 PM