


68 Removing and Installing Parts
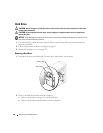
Installing a Hard Drive
1
Unpack the replacement hard drive, and prepare it for installation.
2
Check the documentation for the drive to verify that it is configured for your computer.
3
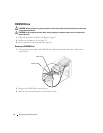
Remove the hard drive bracket (see page 66).
4
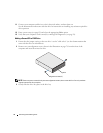
Attach the hard drive to the hard drive bracket:
a
Place the small bracket tabs into the drive-securing screw holes on one side of the drive.
b
Gently swing the drive toward the bracket and align the three screw holes on the other side of the
drive with the screen holes on the bracket.
c
Attach the hard drive bracket to the hard drive.
d
Insert and tighten all three drive-securing screws.
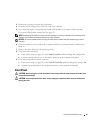
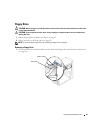
5
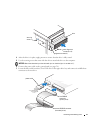
Install the hard drive:
a
Place the two bracket tabs into the drive slots inside the bracket for the additional hard drive.
b
Swing the bracket forward so that it is flush with the bracket for the additional hard drive.
c
Replace the bracket-securing screws.
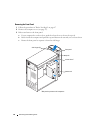
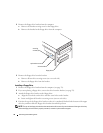
6
Connect a power cable to the drive.
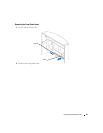
7
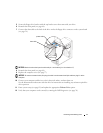
Connect the data cable to the drive and to the system board (see page 54).
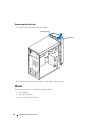
8
Close the computer cover (see page 77).
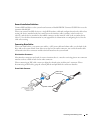
NOTICE: To connect a network cable, first plug the cable into the network wall jack and then plug it into the
computer.
9
Connect your computer and devices to electrical outlets, and turn them on.
See the documentation that came with the drive for instructions on installing any software required for
drive operation.
10
If the drive you just installed is the primary drive, insert a bootable floppy disk into drive A.
11
Turn on the computer.
12
Enter system setup (see page 82), and update the appropriate
Drive
option.
13
Exit system setup, and restart the computer.
14
Partition and logically format your drive before you proceed to the next step.
See the documentation for your operating system for instructions.
15
Test the hard drive by running the Dell Diagnostics (see page 38).
16
If the drive you just installed is the primary drive, install your operating system on the hard drive.