


7-12 Dell PowerEdge 4100/180 and 4100/200 Systems Installation and Troubleshooting Guide
13. Replace the left computer cover, reconnect the
system to AC power, and turn it on.
14. Enter the System Setup program, and update the
system configuration information.
See Chapter 4, “Using the System Setup Program,”
in the User’s Guide for instructions.
For any EISA and ISA expansion cards, enter the
EISA Configuration Utility, and update the con-
figuration information.
See Chapter 5, “Using the EISA Configuration Util-
ity,” in the system User’s Guide for instructions.
15. Run the RAM Test Group in the system
diagnostics.
See Chapter 5, “Running the System Diagnostics.”
Do the tests complete successfully?
Ye s . Go to step 17.
No. See Chapter 11, “Getting Help,” for information
on obtaining technical assistance.
16. Turn off the system, disconnect it from AC power,
and remove the left computer cover.
17. Reinstall one of the expansion cards you removed
in step 12, and repeat steps 13 though 15.
18. Run the RAM Test Group in the system
diagnostics.
Do the tests complete successfully?
Ye s . Go to step 20.
No. See Chapter 11, “Getting Help,” for information
on obtaining technical assistance.
19. Repeat steps 17 through 19 for each of the
remaining expansion cards that you removed in
step 12.
Have you reinstalled all of the expansion cards with-
out encountering a test failure?
Ye s . You have fixed the problem.
No. See Chapter 11, “Getting Help,” for information
on obtaining technical assistance.
T
roubleshooting System Memory
A system memory problem can be a faulty dual in-line
memory module (DIMM) or a faulty system board. If a
random-access memory (RAM) error message appears,
the system probably has a memory problem.
When you turn on or reboot the system, the Caps Lock
and Scroll Lock indicators on the keyboard should flash
momentarily and then turn off. If the
NUM LOCK
category
in the System Setup program is set to
ON, the Num Lock
indicator should flash momentarily and then remain on;
otherwise, it should turn off. Abnormal operation of these
indicators can result from a defective DIMM in socket
DIMM A. Follow these steps to troubleshoot system
memory:
1. Turn on the system, including any attached
peripherals.
Does an error message appear indicating invalid sys-
tem configuration information after the memory
count completes?
Ye s . Go to step 2.
No. Go to step 8.
2. Enter the System Setup program to check the
TOTAL MEMORY
or
SYSTEM MEMORY
category.
See Chapter 4, “Using the System Setup Program,”
in the User’s Guide for instructions.
Does the amount of memory installed match the
TOTAL MEMORY
or
SYSTEM MEMORY
setting?
Ye s . Go to step 8.
No. Go to step 3.
3. Turn off the system, including any attached
peripherals, and disconnect all the AC power
cables from their power sources.
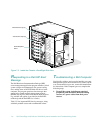
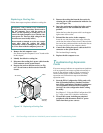
4. Remove the left computer cover.
See “Removing the Computer Covers” found earlier
in this chapter.
CAUTION: See “Protecting Against Electro-
static Discharge” in the safety instructions at
the front of this guide.