Dell PowerEdge 4300 System Board Upgrade Installation 9
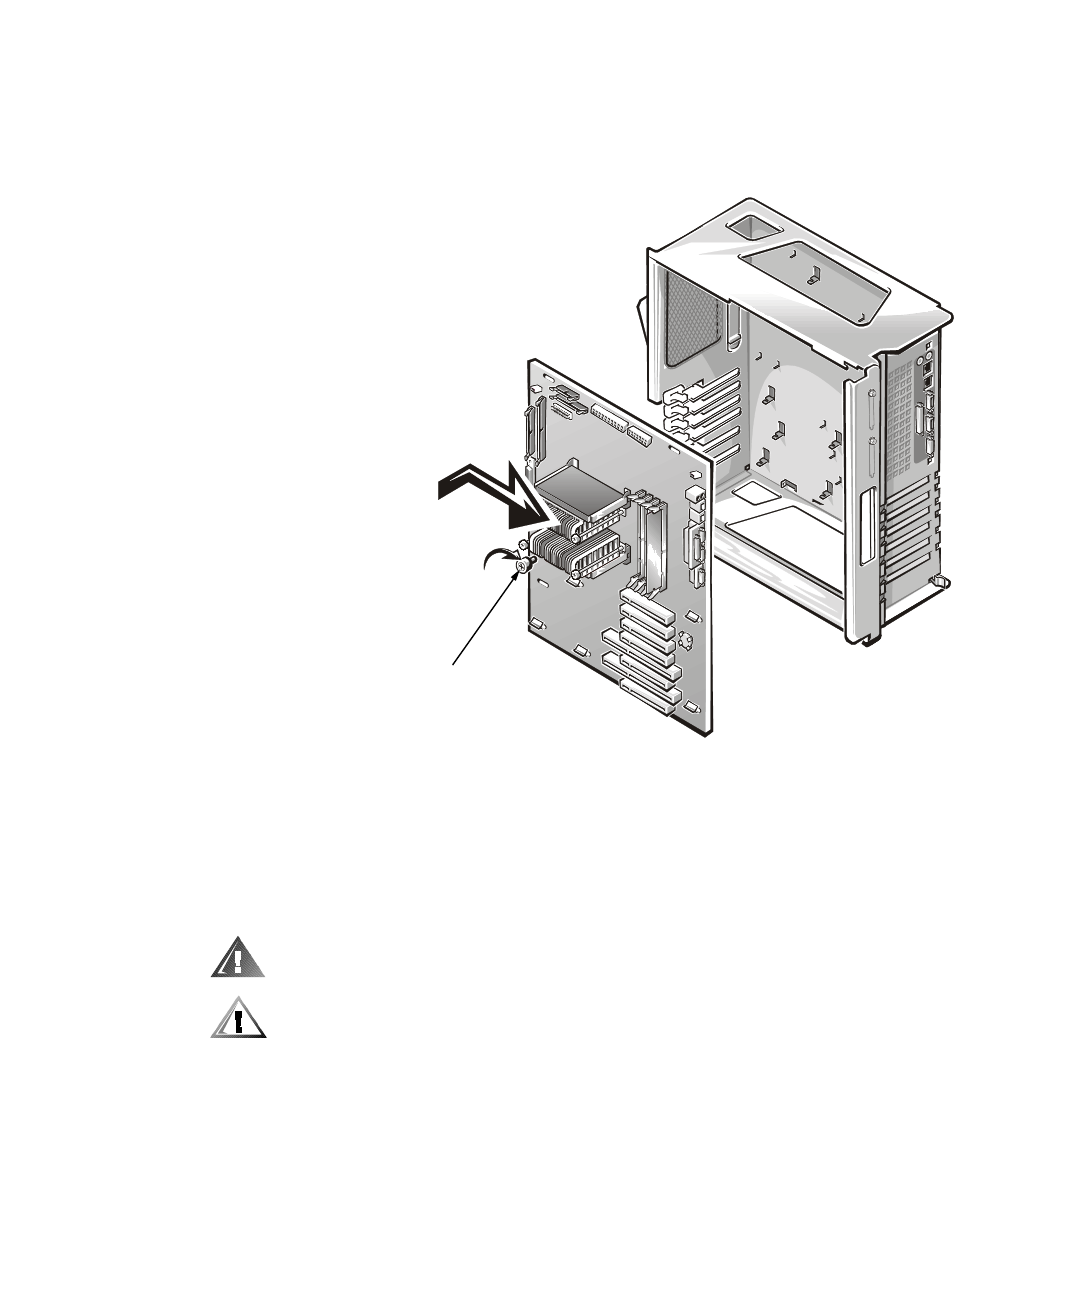
2. Slide the system board to the right about a centimeter (half an inch) to lock the
board in place (see Figure 7).
3. Secure the system board with the thumbscrew (see Figure 7).
)LJXUH6\VWHP%RDUG,QVWDOODWLRQ
,QVWDOOL QJ6 \V WHP %R DUG &RP SRQ HQ WV
To install all the components you removed from the original system board on to the
new system board, perform the following steps.
:$51,1*:KHQKDQGOLQJDQGLQVWDOOLQJPLFURSURFHVVRUVRQWKHV\VWHP
ERDUG WD NHFDUH W R DYR LG VK D US H GJ H VR Q W KH K HD W VLQ N
&$87,21,I\RXUV\VWH P VXS SR UW VPR UH WK DQWZRPL FU R SUR F HV VR UV EXW \ R X
DUH R QO \ LQVWD OOLQJR Q H P L FURSUR FH V VRUH DFKRI W K H UHPD LQ LQ JPLFUR
SURFH VVR U FR Q QH FWR U VP X VW K DYH DW H UPLQ D WR U FD UG LQ V WD OOH G
1. Install all the components you removed from the original system board (micro-
processors, terminator card[s], and DIMMs).
2. Install all internal cables to their connectors on the new system board (use the
notes you made when you removed the cables from the original system board) .
