


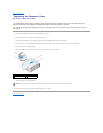
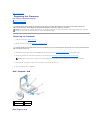
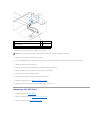
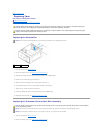

4. Remove the four screws securing the hard drive to the chassis.
5. Slide the drive out away from the front of the computer.
6. If you are replacing the drive or installing a new one, check the documentation for the drive to verify that it is configured for your computer.
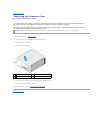
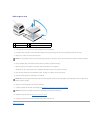
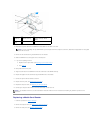
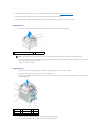
7. Slide the hard drive into the hard drive bay.
8. Align the four screw holes in the hard drive with the screw holes in the hard drive bay.
9. Replace and tighten the four screws to secure the hard drive to the chassis.
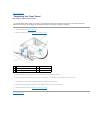
10. Connect the power and data cables to the drive.
11. Ensure that all the cables are properly connected and firmly seated.
12. Replace the computer cover (see Replacing the Computer Cover).
13. Connect your computer and devices to electrical outlets, and then turn them on.
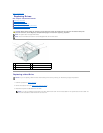
Replacing a CD/DVD Drive
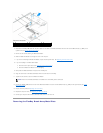
1. Follow the procedures in Before You Begin.
2. Remove the computer cover (see Removing the Computer Cover).
3. Remove the front panel(see Replacing the Front Panel).
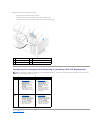
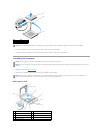
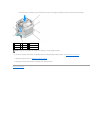
1
screw holes in the hard drive bay (4)
2
screws (4)
3
system board connector (any available connector
SATA0 - SATA3)
4
serial ATA data
cable
5
power cable
6
hard drive
NOTICE: Ensure that you do not scratch the hard disk circuit board, while removing or replacing the hard drive.