


270
| Dell Document Hub
5 Tap the File Format box, and then select a file format.
6 Tap , and then check and change the scan settings.
See "Smart OCR Scan" and "Scan Settings.”
NOTE:
• You can save your print settings and file path to the cloud service as a favorite.
1 Tap in the Scan Settings screen.
2 Name your favorite in the Save Favorite screen, and then tap Save.
• If you choose a name for a favorite that is the same as an existing favorite, the settings and the
file path will be overwritten.
• You can delete an unnecessary favorite by tapping .
• Once you save your settings as a favorite, you can recall those settings the next time you sign
in to Dell Document Hub from any printer of the same model.
7 Tap Scan.
When the document is loaded on the document glass, the screen prompts you for
another page.
• If you want to scan another document, replace the document with a new
document, and then tap Continue.
• When you have finished loading documents, tap Done.
Sending the Scanned Data to Yourself via E-Mail
The document can be scanned and sent to you as an attached file of an e-mail.
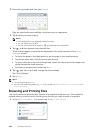
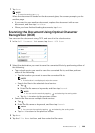
1 In the Dell Document Hub screen, tap E-mail Me.
2 Tap the File Format box, and then select a file format.
3 Tap the Subject text box, and then enter the subject of the mail sent with the
scanned data.
4 Tap , and then check and change the e-mail settings.
See "E-mail Me" and "Scan Settings."
NOTE:
• You can save your e-mail settings to the cloud service as a favorite.
1 Tap in the Scan Settings screen.
2 Name your favorite in the Save Favorite screen, and then tap Save.
• If you choose a name for a favorite that is the same as an existing favorite, the settings and the
file path will be overwritten.
• You can delete an unnecessary favorite by tapping .
• Once you save your settings as a favorite, you can recall those settings the next time you sign
in to Dell Document Hub from any printer of the same model.
5 Tap Send.