


2 Dell M781mm Color Monitor Quick Setup Guide
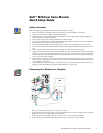
5. Connect the red microphone plug to the red “mic out” connector at the rear of the audio base.
6. Connect the other red microphone plug to the red “microphone input” connector of your computer.
7. Connect the black DC adapter plug to the black DC connector at the rear of the audio base.
8. Plug the adapter into a nearby wall outlet.
9. Fully insert the monitor power cable into the power port on the back of the monitor.
10. Plug the power cables of your computer and your monitor into a nearby electrical outlet.
11. Turn on your computer and monitor. If the monitor does not display an image, refer to the troubleshooting section of this
guide.
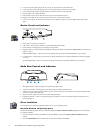
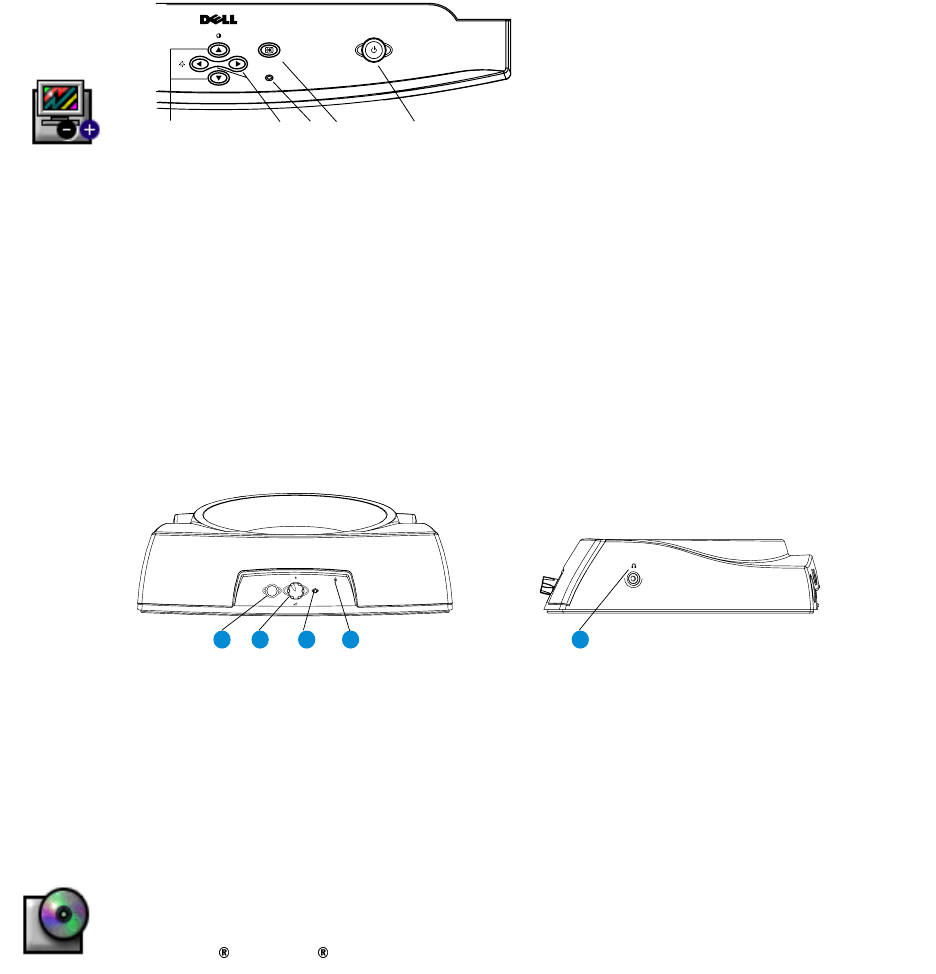
0RQLWRU&RQWUROVDQG,QGLFDWRUV
1. Power button - Switches your monitor on.
2. "OK" button - When pressed it will take you to the Main OSD Menu controls.
3. Power Indicator - This light glows green during normal operation.
4. Brightness hotkeys - Pressing either Left or Right arrow directly will adjust screen brightness (BRIGHTNESS control bar will
appear on screen).
LEFT and RIGHT buttons - These are also used for adjusting other functions in the Main OSD Menu of your monitor.
5. Contrast hotkeys - Pressing either Up or Down arrow directly will adjust screen contrast (CONTRAST control bar will appear
on screen).
UP and DOWN buttons - These are also used for selecting other functions in the Main OSD Menu of your monitor.
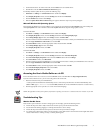
$XGLR%DVH&RQWUROVDQG,QGLFDWRUV
1. Microphone location - When recording sound, speak towards this location.
2. Audio Power Indicator - This light glows green after turning the volume control clockwise.
3. Volume Control: Turn the rotary knob clockwise to power on and increase the sound volume. turn the rotary knob fully counter
clockwise to switch-off the audio base.
4. Bass boost switch: Depress the switch for increased bass performance.
5. Earphone Connection - connect your earphone plug to the earphone connector (the speakers will be switched off when ear-
phone is plugged in).
'ULYHU,QVWDOODWLRQ
Use the monitor CD to install the appropriate monitor driver for your operating system.
0LFURVRIW :LQGRZV 2SHUDWLQJ6\VWHP
Windows 98 automatically detects the new monitor and displays the Add New Hardware Wizard dialog box if the monitor driver
is not already installed.
1. Insert the monitor CD into the CD-ROM drive, and click Next> twice when the Add New Hardware Wizard dialog box
appears.
2. Click the CD-ROM drive box to install the drivers from the CD and then click Next>.
MENU
j
k
l
m
n
43 2 1
BASS
5