


Dialogic® 3000 and 4000 Media Gateway Series Quickstart Guide
page 11
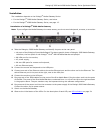
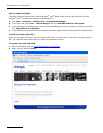
Installation
The installation depends on the Dialogic
®
Media Gateway Series:
• For the Dialogic
®
3000 Media Gateway Series, see below.
• For the Dialogic
®
4000 Media Gateway Series, see page 12.
Installation of a Dialogic
®
3000 Media Gateway
Note: If you configure the Media Gateway via remote access, you do not need a keyboard, a mouse, or a monitor.
1. Take the Dialogic
®
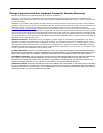
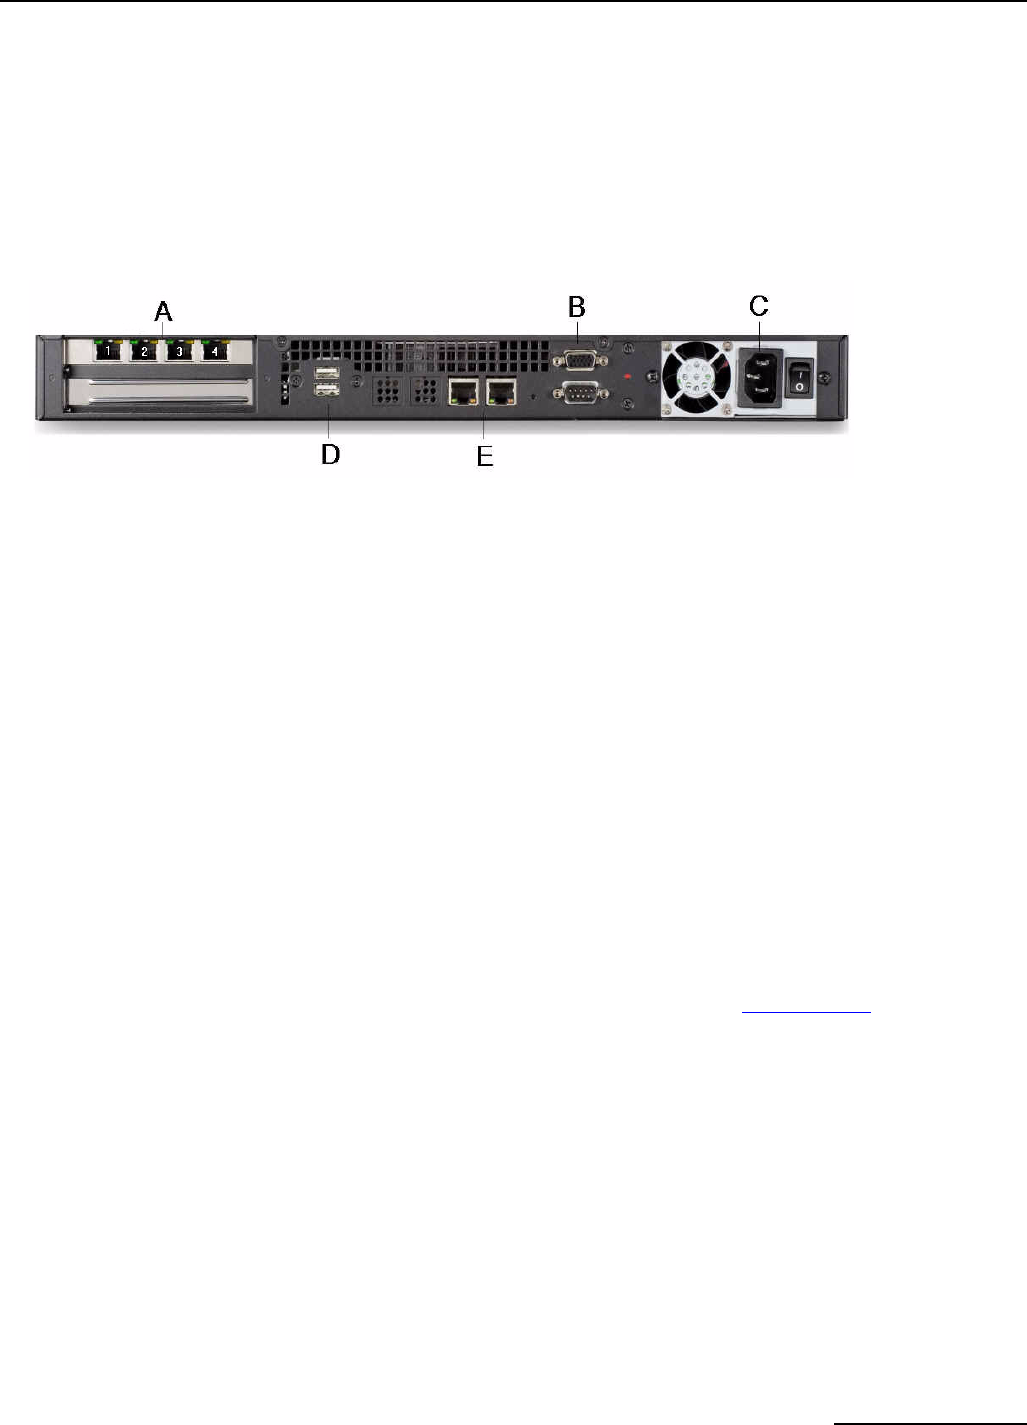
3000 Media Gateway and identify its ports at the rear panel:
• A: ports of the Dialogic
®
Diva
®
Media Board. The above graphic shows a Dialogic
®
3008 Media Gateway;
therefore, the four ports of one Dialogic
®
Diva
®
4BRI-8 Media Board are displayed.
• B: VGA port for the monitor,
• C: power supply,
• D: two USB ports for mouse and keyboard,
• E: two Ethernet ports.
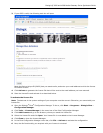
2. Connect the mouse and keyboard to the USB ports.
3. Connect one end of the Ethernet cable to the active Ethernet port and the other end to the Ethernet. The
active Ethernet port is the port at the right, next to the VGA port.
4. Connect the monitor to the VGA port.
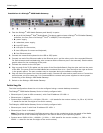
5. Plug one end of the ISDN cables into the ports of the Diva Media Board. Plug the other ends into the ports
of the PBX. The ports of the Diva Media Board are numbered from 1 to 4 from the left to the right as shown
in the graphic above. The port numbers may be important during the software configuration.
6. Plug one end of the power cord into the connector to the power supply of the Dialogic 3000 Media Gateway.
Connect the other end to power source.
7. Switch on the Media Gateway.
8. Observe the initial status of the LEDs. For the description of each LED, see LED indicators
on page 24.