Install Guide
Model: MIL-4711H 5
Assigning an IP Address
Every device on a TCP/IP network is identified by two addresses:
• The address is a 6-byte address assigned to the 4711H by the manufacturer.
• The IP address is a 4-byte address assigned by the system admin. Set this.
The MIL-4711H stores its IP address in its NVRAM (default: 0.0.0.0).
Caution:
When the address is 0.0.0.0, the 4711H uses RARP or BOOTP to acquire an address.
The following are ways to assign an IP address to the hub:
• Make a telnet connection via port 2002, or connect serially and set the IP
address manually.
• Use a RARP server to set the address each time the MIL-4711H powers up.
• Use BOOTP to set the address each time the MIL-4711H powers up. This is the
preferred method in larger networks as BOOTP can work through routers.
Note:
Neither telnet nor RARP work if the server is connected through a router on a different
subnet from the MIL-4711H. To assign an IP address, put the MIL-4711H on the same
subnet as the host, set-up an ARP entry with an IP address that is valid for that subnet,
telnet to the unit, and assign an appropriate IP address.
Setting the IP Address with Telnet
The following only works if the MIL-4711H is on the same subnet as the host from
which you want to telnet. In this example, you are to add a MIL-4711H called
alpha
with an IP address
192.185.2.3
and an Ethernet address of
0040c800012B
.
To set the IP Address using Telnet:
1. Use a text editor to open the /etc/hosts file.
2. Add the following line and save the file:
192.185.2.3 alpha
3. Use this to set the static ARP entry for a host on the same subnet as the 4711H:
arp -s alpha 00:40:c8:00:01:2B
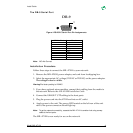
4. Set the rear panel DIP switches D2 up and D1 down and power cycle the unit.
5. Make a telnet connection to maintenance port 2002:
telnet alpha 2002, or connect an ANSI compatible terminal to the RS-232 port
6. Type [!] to enter the monitor menu.


