


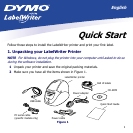
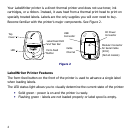

5
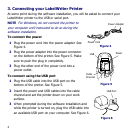
To connect using the serial port
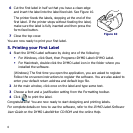
1 Plug the serial cable into the serial port on the
bottom of the printer. See Figure 7.
2 Insert the power and serial cables into the cable
channel and set the printer down on your work
surface.
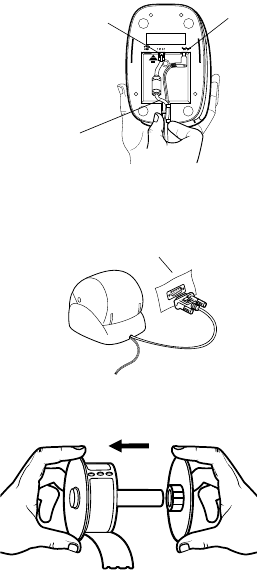
3 When prompted during the software installation
and while the printer is turned on, plug the
serial connector into the serial (COM) port on
your computer. See Figure 8.
The installation automatically continues when the
system detects the LabelWriter printer.
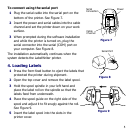
4. Loading Labels
1 Press the form-feed button to eject the labels that
protected the printer during shipment.
2 Open the top cover and remove the label spool.
3 Hold the spool spindle in your left hand and
place the label roll on the spindle so that the
labels feed from underneath.
4 Place the spool guide on the right side of the
spool and adjust it to fit snugly against the roll.
See Figure 9.
5 Insert the label spool into the slots in the
printer cover.
Figure 7
Serial
Connection
Power
Cable
Channel
Figure 8
Serial Port
Figure 9