


2
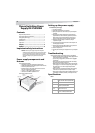
Contents
Dynex Switching Power
Supply DX-PS400W2
Contents
Important safety instructions........................................................... 2
Power supply components and features........................................... 2
Setting up the power supply............................................................ 2
Troubleshooting............................................................................... 2
Specifications................................................................................... 2
Legal notices .................................................................................... 3
Français ....................................................... 4
Español ........................................................ 6
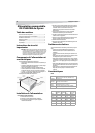
Important safety instructions
Caution: Check the red power supply voltage switch setting before
installation. The setting should be the same as your local power voltage
(115 V for North America. And 230 v for Europe and other countries).
Change the voltage setting if necessary. Failure to take this precaution
could result in damage to your equipment and could void your
warranty.
Power supply components and
features
Power supply features include:
• Input voltage range of 90-135/180-265 Vac (switch select)
• Complies with Intel ATX12V V2.0, fully supports new dual core CPU
• Internal fan speed control function
• Detachable 24 pin to 20pin power connector that can be used
with 24 pin and 20 pin system boards
• 1x S-ATA + 1x PCI-E graphic card 6 pin connector
• Low Acoustic noise MTBF>50,000 hours at 25°
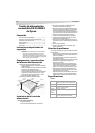
Power supply components include:
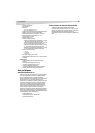
Setting up the power supply
To install the new power supply:
1 Turn off your computer.
2 Unplug the power cord from your computer.
3 Open your computer case. For instructions, see your computer’s
user guide.
4 Disconnect power supply cables from the system board and
peripheral devices, such as hard drives, optical drives, and fans.
Make sure that you note where all the power connectors are
because you will need to reconnect the power supply cables.
5 Remove the old power supply. For instructions, see your
computer’s user guide.
6 Install the new power supply and secure it to the computer case
with the appropriate screws.
7 Reconnect all power supply cables using the notes you made in
step 4. Make sure that each connection is secure.
8 Close the computer case.
9 Plug the power cord into your computer, then turn your computer
on.
Troubleshooting
If your new power supply is not working correctly, try the following:
• Make sure that the computer power cord is firmly plugged into the
power cord connector on your computer.
• If you are using a surge protector, make sure that it is plugged in
and turned on.
• Make sure that the wall outlet is supplying power. For example,
plug a lamp into the outlet and turn it on.
• Make sure that the red voltage switch (located on the back of the
power supply) is set to the correct voltage setting. The setting for
the United States is 115 V. The setting for Europe and other
countries is 230 V.
• Make sure that the system board power supply cable is securely
connected to the system board connector (24 pin or 20 pin).
• Make sure that all power supply cables to peripheral devices, such
as hard drives, optical drives, and fans, are securely connected.
Specifications
INPUT
Output cable
3.4inches
(86mm)
5.9 inches
(150.0mm)
5.5inches
(140.0mm)
AC socket
Voltage switch
Power switch
Fan
Voltage
USA: 115 Vac (90-132 VAC)
Europe and others: 230 Vac (180-264 VAC)
Frequency
47Hz-63Hz
Current
7.0A (max.) at 115 Vac/60 HZ
4.0A (max.) at 230 Vac/50 HZ
Inrush
current
70 A (max.)at 230 Vac
Cold start at 77°F (25°C)
Efficiency
70% min. at full load 230 Vac/50 Hz
60% min. at 30 W load 230 Vac/50 Hz