


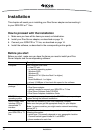

Installation14
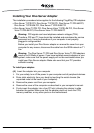
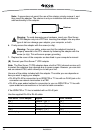
Note: If space does not permit the use of the retainer, simply remove it, and
then insert the adapter. The retainer is only an installation aid and does not
add functionality to the adapter.
6. Firmly secure the adapter with the screw (or clip).
7. Replace the cover of the computer as described in your computer’s manual.
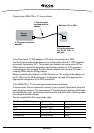
(B) Connect your Diva Server T1/PRI adapter
Note: The Diva Server T1/PRI adapters have a built-in CSU (channel service unit)
to protect the adapters from damage due to power surges. However, you can also
use an external CSU, which allows you to test your line.
Use one of the cables included with the adapter. The cable you use depends on
how you want to apply your adapter:
• RJ-45 to RJ-45 for connection to an ISDN PRI or T1 line with an RJ-45 jack or for
connection as network termination to a PBX
• RJ-45 to open-ended cables for connection to your an ISDN PRI or T1 line with
open-ended wire connections or for back-to-back connection
If the ISDN PRI or T1 line is installed with an RJ-45 jack:
Use the supplied RJ-45 to RJ-45 cable:
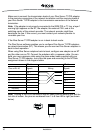
Warning: To avoid damaging your hardware, insert your Diva Server
T1/PRI adapter only into a PCI slot. Inserting the adapter into any other
type of slot can damage your adapter, your computer, or both.
Warning: For your safety, make sure that the adapter’s bracket is
properly secured to the PC’s chassis by fastening the adapter with the
screw (or clip). This will ensure proper grounding.
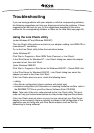
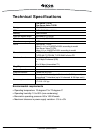
Diva Server T1/PRI Adapter Signals RJ-45 Terminal
Pin 1 Receive + (RX +) Pin 1
Pin 2 Receive - (RX -) Pin 2
Pin 4 Transmit + (TX +) Pin 4
Pin 5 Transmit - (TX -) Pin 5
shielded plug overall shielded shielded plug
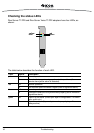
Retainer