


Epson AcuLaser CX11N/CX11NF
8 - Epson AcuLaser CX11N/CX11NF 8/05
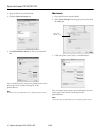
Starting EPSON Scan With Another
Scanning Application
1. Start your scanning program.
Double-click the program icon from your desktop, if it is
available, or do one of the following:
Windows:
Select
Start > All Programs or Programs > program
folder > program icon
.
Mac OS X:
Open the
Applications folder, select the program folder,
and click the
program icon.
2. Select your program’s scanning option. (See your scanning
program help for instructions.)
Note:
In some programs, you must select the Epson AL-CX11 as the
“source” first. If you see a Select Source option, choose it and
select your Epson AL-CX11 there first.
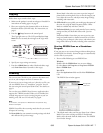
3. Select your EPSON AL-CX11.
Note:
For Windows XP users, do not choose WIA-EPSON from the
menu to select the product. If you select it, you cannot use the
Epson scanner function fully.
EPSON Scan starts immediately.
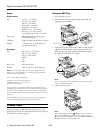
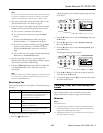
Using the Control Panel Buttons
You can scan an image to your computer using the buttons on
the CX11N control panel. Before using this feature (Push
Scan), make sure you have installed EPSON Scan, EPSON
Creativity Suite, and Presto! PageManager
®
on your
computer.
Selecting a Scanning Mode for a Network PC
Note:
You cannot use Push Scan over a Macintosh network, only on a local
Macintosh.
To make scanning settings other than file format while
scanning to a network PC, press the
Scan button, press
the u or d button to select
Network PC, press the u or d
button to select the
PC Name, then press the Menu button.
Press the d button to select
Manual Scan and then press the
r button.
The following table shows the settings and options for each
scan mode.
Scanning
Follow these steps to scan:
1. Connect the CX11N to your computer with a USB cable or
a network cable as described in your Setup Guide.
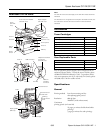
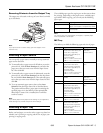
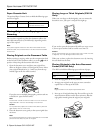
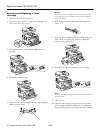
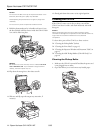
2. Turn on the CX11N. Place your originals on the document
table (see page 6) or in the Auto Document Feeder
(CX11NF only; see page 6).
Caution:
Make sure the transportation lock on the left side of the
document table is set in the unlock position.
3. Press the Scan button.
4. Press the u or d button to select either
Local PC or
Network PC, then press the r button.
When you select
Local PC, you see a message on your
computer screen. Select your scanning program, scan your
document, and close your scanning program. The CX11N
returns to the Print mode.
When you select
Network PC, the network computer name
appears in the LCD screen. Press the u or d button to
select your network computer, and then press the r button.
5. Press the l or r button to select a file format.
6. Press the x
B&W Start or x Color Start button on the
control panel.
EPSON Scan starts scanning. When the scanning is
complete, remove your originals from the document table
or the Auto Document Feeder.
If you need to cancel scanning, press the y
Cancel button.
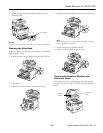
Faxing (CX11NF Only)
Sending a Basic Fax
1. Make sure the CX11NF is turned on, then press the
Fax button.
The Fax light turns on and the LCD screen shows Fax
Mode for a few seconds, then changes to the fax menu.
Scan modes Available settings Items
Automatic scan File Format PDF, TIFF, JPG
Manual scan File Format PDF, TIFF, JPG
Paper Size A4, B5, Letter, Legal
Scan modes Available settings Items