


TM-U210 Series User’s Manual 9
English
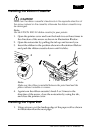
Note:
Do not remove the screw from the print head cover.
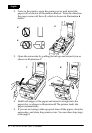
8. Lift up the print head cover as shown in illustration
14
on the
previous page.
9. Remove all the jammed paper.
Note:
Do not pull the jammed paper in the opposite direction of paper
feeding.
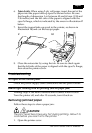
10. Replace the print head cover and secure it with the screw.
11. Replace the ribbon cassette and close the autocutter.
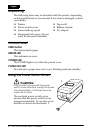
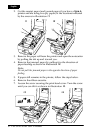
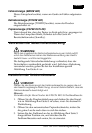
12. If the autocutter blade is not in its normal position (if you can
see the blade in the autocutter slit, which is indicated by an
arrow in illustration
15
below), the blade is not in the normal
position), insert a screwdriver to the right side of the
autocutter, and turn the gear inside to move the blade to the
normal position.
13. Replace the paper roll and close the printer cover.
15