


Epson STYLUS NX100/NX105/SX100/SX105/TX100/TX101/TX102/TX103/TX105/TX106/TX109/ME 300 Revision A
DISASSEMBLY/ASSEMBLY Disassembling the Printer Mechanism 80
Confidential
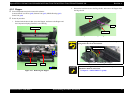
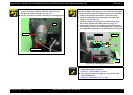
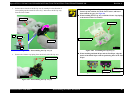
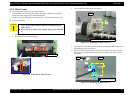
3. Release the two hooks of the IS Cap Assy by rotating it to the direction of
arrow pulling out the central rib of the assy., and remove the IS Cap Assy
from the Case Cleaner.
Figure 4-58. Disassembling the Cap Assy (2)
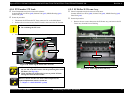
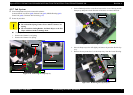
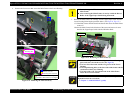
4. Remove the Cleaner Cap Spring from the dowels of the IS Cap Assy.
Figure 4-59. Disassembling the Cap Assy (3)
Back
Hook
Rib
IS Cap Assy
Case Cleaner
Dowel
IS Cap Assy
Cleaner Cap Spring
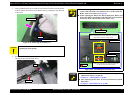
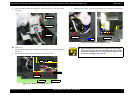
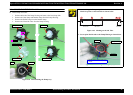
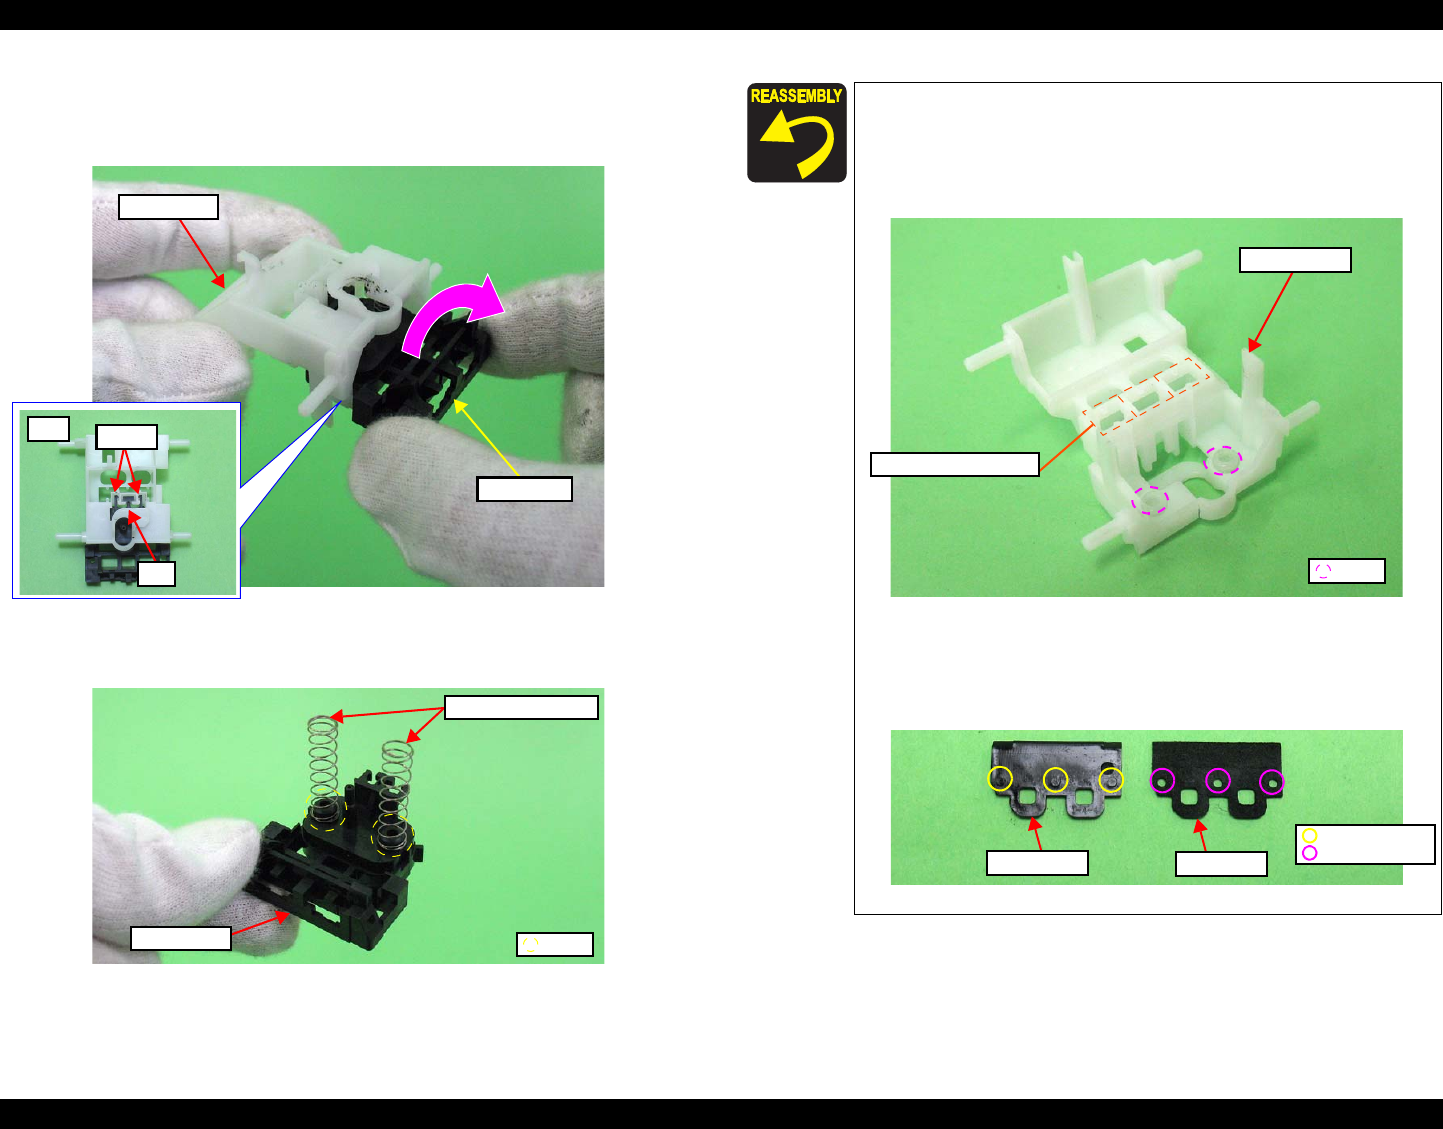
When installing the Foam Cap Side, align the notchs of the
Foam Cap Side with the ribs of the Case Cleaner
, and insert
them without any gap.
(See Fig.4-60.)
When installing the IS Cap Assy, install the Cleaner Cap Spring
to the dowels of the Case Cleaner.
Figure 4-60. Assembling the Cap Assy (1)
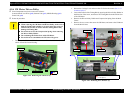
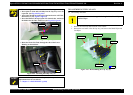
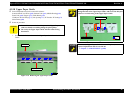
When installing the Blade Wiper and the Felt Wiper, align the
dowels of the Blade Wiper with the positioning holes of the Felt
Wiper.
Figure 4-61. Assembling the Cap Assy (2)
Case Cleaner
Ribs of Foam Cap Side
Dowel
Positioning Hole
Dowel
Felt Wiper
Blade Wiper