


Epson STYLUS NX100/NX105/SX100/SX105/TX100/TX101/TX102/TX103/TX105/TX106/TX109/ME 300 Revision A
DISASSEMBLY/ASSEMBLY Disassembling the Printer Mechanism 87
Confidential
4.5.11 CR Unit
Parts/Components need to be removed in advance:
Scanner Stand/Cover Wire (p 60), Scanner Unit (p 62), Middle Housing (p 63)
Panel Unit (p 64), Printhead (p 68), CR Motor/ Driven Pulley (p 75)
Ink System (p 77), Hopper (p 72), Main Board (p 65)
Removal procedure
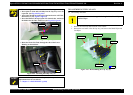
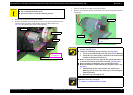
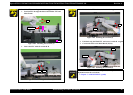
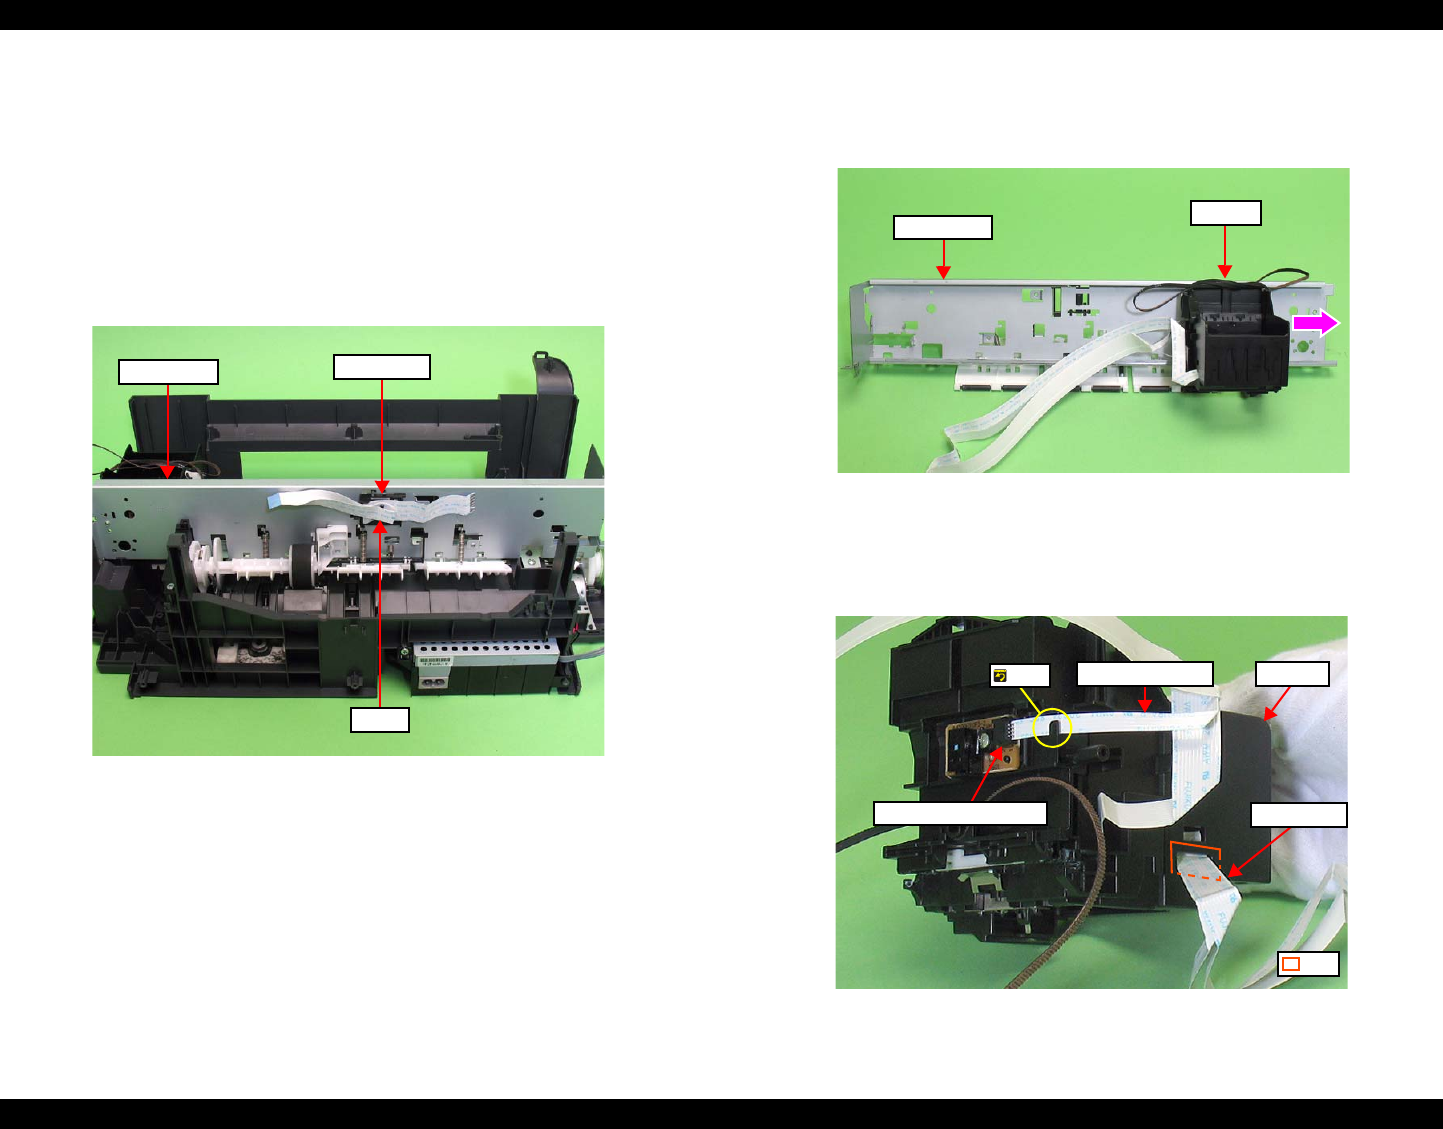
1. Release the FFC from the Holder FFC, and pull out the FFC through the hole
of the Main Frame.
Figure 4-78. Removing the CR Unit (1)
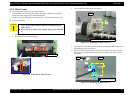
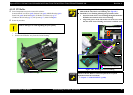
2. Remove the Main Frame. (See "4.5.9 Main Frame (p84)".)
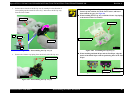
3. Slide the CR Unit in the direction of the arrow, and remove it from the Main
Frame.
Figure 4-79. Removing the CR Unit (2)
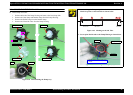
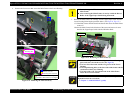
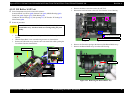
4. Remove the CR Encoder FFC from the CR Encoder Connector.
5. Pull out the Head FFC through the hole of the Carriage, and remove the Head
FFC.
Figure 4-80. Removing the CR Unit (3)
FFC
Holder FFC
Main Frame
CR Unit
Main Frame
Hole
Head FFC
Carriage
CR Encoder Connector
CR Encoder FFC
Rib