


Epson Perfection 4180 PHOTO
2 - Epson Perfection 4180 PHOTO 6/04
Environmental
Temperature Operation: 41 to 95 °F (5 to 35 °C)
Storage: –13 to 140 °F (–25 to 60 °C)
Humidity Operation: 10% to 80%
(without Storage: 10% to 85%
condensation)
Operating Ordinary office or home conditions; avoid
conditions extreme dust, direct sunlight, and strong
light sources.
Safety Approvals
Safety UL 60950
CSA C22.2 No. 60950
EMC FCC part 15 subpart B class B
CSA C108.8 class B
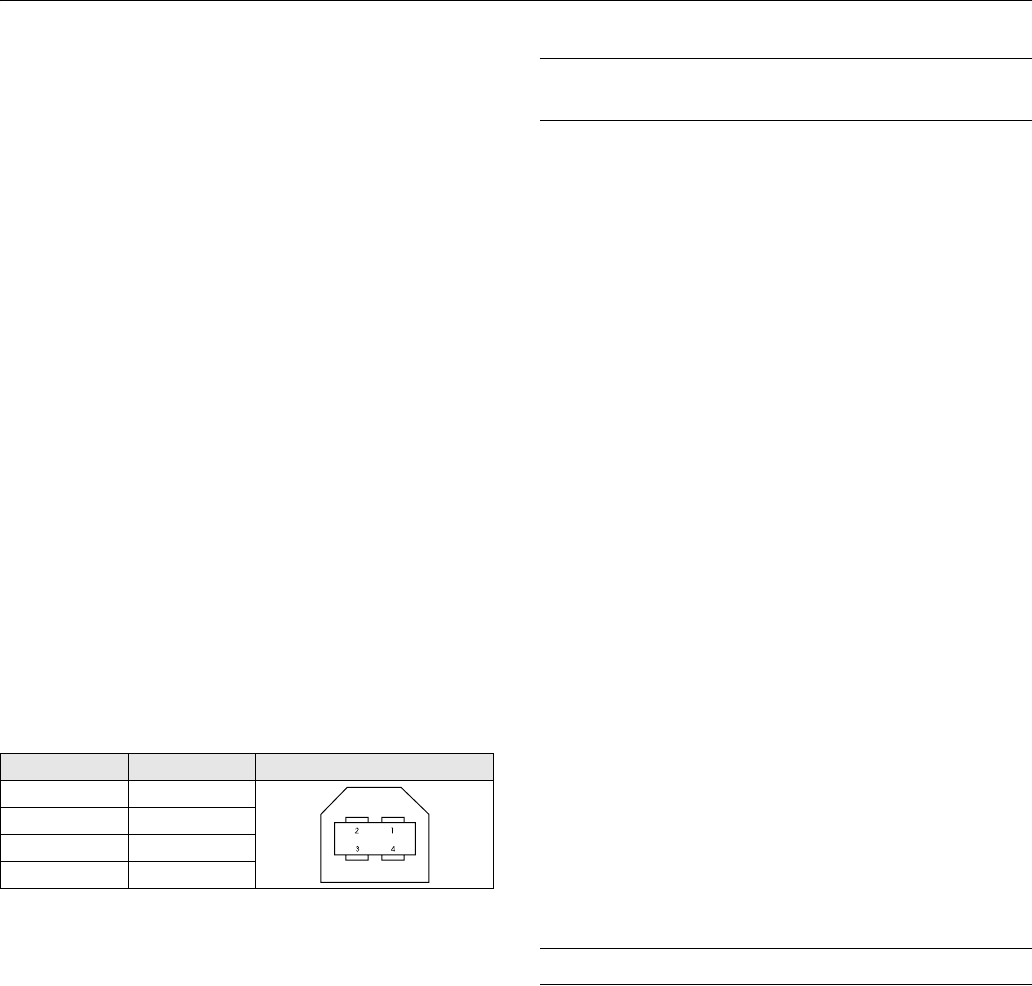
USB Interface
Interface type Universal Serial Bus Specification
Revision 2.0
Connector type One receptacle (Type B)
Electrical Full Speed mode (12 Mbps) and High
standard Speed mode (480 Mbps), Universal
Serial Bus Specification Revision 2.0
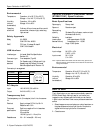
Connector pin arrangement
AC Adapter
Input 100-120 VAC, 50 to 60 Hz
Output 24.0-26.4 VDC, 1.4 A
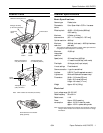
Transparency Unit
The transparency unit (film adapter) is built into the scanner
lid.
Electrical Supply voltage: DC 24.0 to 26.4 V
Rated current: 0.5 A
Document Positive or negative film in these sizes:
specifications 35 mm strips
35 mm slides
120/220 (up to 6 × 12-cm) film
Readable area 2.6 × 9.1 inches (66 × 231 mm)
Optional Automatic Document Feeder
(B12B813341) Specifications
Basic Specifications
Paper supply Face up load
Paper out Face down eject
Paper setting
quantity 30 sheets (55 g/m2 paper, maximum total
thickness under 6 mm)
Reliability load/eject:
(mean cycles plain paper sheets - 20,000
between failure) transparency film - 10,000
hinge: 12,000 cycles
Electrical
Input voltage 24 VDC ± 10%
5 VDC ± 15%
Input current 24 V: 0.8 A
5 V: 0.2 A
Note: Optional ADFs sold outside the US market may operate at a
different voltage. Check the label on the back of the scanner for
voltage information.
Environmental
Temperature Operation: 50 to 90 °F (10 to 32 °C)
Storage: -4 to 140 °F (-20 to 60 °C)
Humidity Operation: 20 to 80%
(without Storage:10% to 85%
condensation)
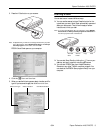
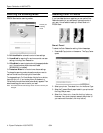
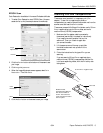
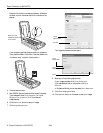
How to Scan
The ] Start button on your scanner automatically opens the
EPSON Smart Panel, making it easy for you to scan your
images for many different uses. Here’s how you can use the
] Start button and Smart Panel to scan photos and save them
as files.
1. Raise the scanner cover and place your photo face down on
the glass. Make sure the top right corner of the photo is
aligned with the top right corner of the scanner.
2. Close the cover.
Pin number Signal Connector
1VCC
2 –DATA
3+DATA
4 GND