


2008-8-14 13:38 PM
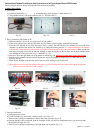
Fig.3-1 Fig.3-2 Fig.3-3
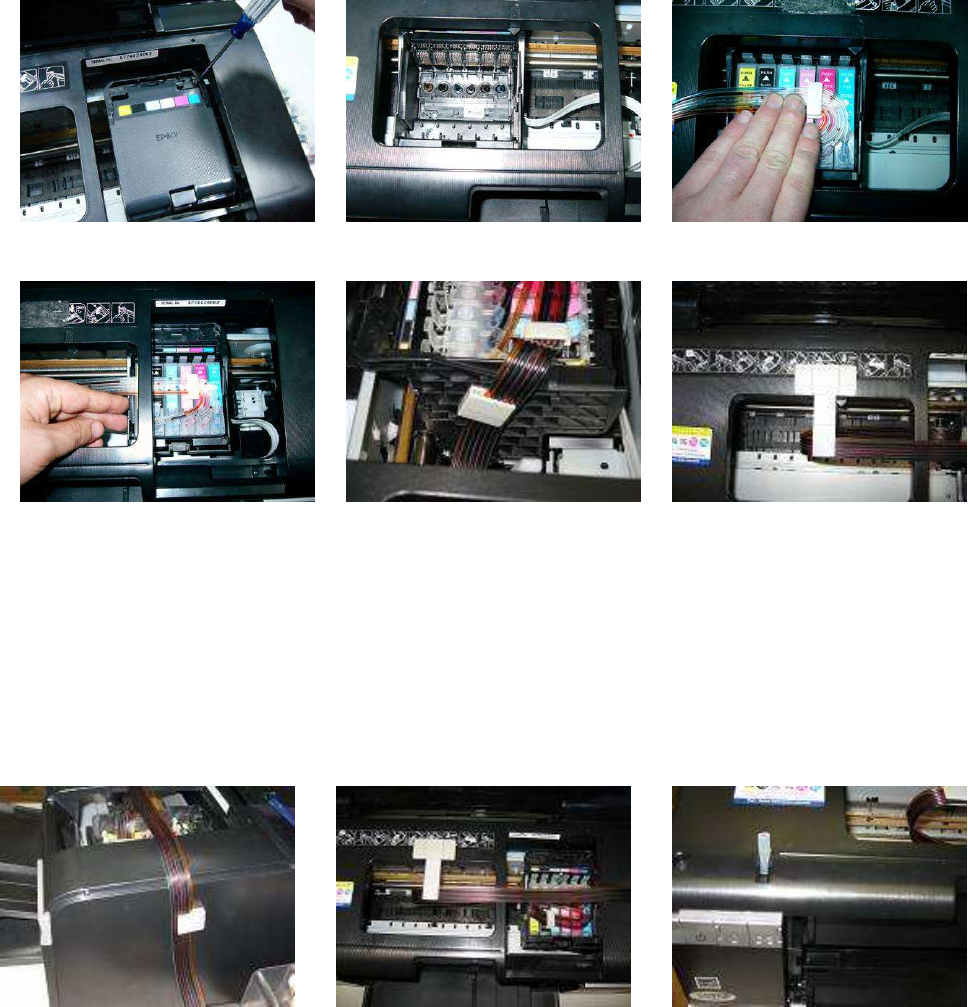
Fig.3-4 Fig.3-5 Fig.3-6
4. Tube Adjustment and Positioning
a. Insert the tubing into one of the square shaped adhesive pads and then place the pad on the left side of the cartridge
compartment as shown (fig.3-5).
b. Place the T shape adhesive pad as shown (Fig 3-6).
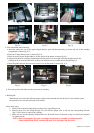
c. Place the second square shaped adhesive on the outside of the printer as shown (fig.4-1).
d. Adjust tubing between cartridge compartment and tube guide to correct length; allowing enough room for the
cartridge to move back and forth freely ,making sure the tubes are not twisted and are straight (Fig.4-2).
e. Insert the plastic tube into the sensor slot for the cover on the printer as shown (fig. 4-3).
Fig 4-1 Fig 4-2 Fig 4-3
d. Turn on the printer and make sure the system moves smoothly.
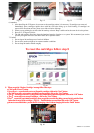
5. Refilling Ink
When the ink levels reach the indicator margin (sticker on the ink tank with red line Fig 5-1) the ink tank system
has reached its low level line and needs to be refilled.
Follow these steps:
1. Gently remove the air breather plugs in order to have more filling room.
2. Remove plugs off of the filling hole(Fig 5-2) and refill the proper color of ink into the corresponding ink tank
(Fig 5-3),(use towel to wipe off any spillage).
3. Make sure you use the specially designed inks Low Foam Ink for the CI System as they are specifically designed
for optimal results.
NOTE: When removing the CIS, remove cartridges and put tape or a napkin over dispensing hole.
Printer and ink tank MUST remain at the same level (not higher and not lower).