


Installation, cont’d
CrossPoint Matrix Switchers • Installation2-2
Installation
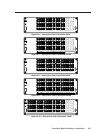
Rack Mounting the Switcher
The CrossPoint 84, 88, 124, and 128 Matrix Switchers are housed in rack-mountable,
3U high, 19” wide metal enclosures. The CrossPoint 168 and 1616 are in 6U high
enclosures. The appropriate rack mount kit is included with each switcher. Rack
mount the switcher as follows:
1. Insert the switcher into the rack, align the holes in the mounting bracket with
those of the rack.
2. Secure the switcher to the rack using the supplied machine screws.
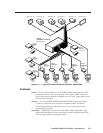
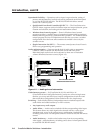
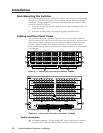
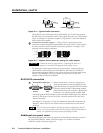
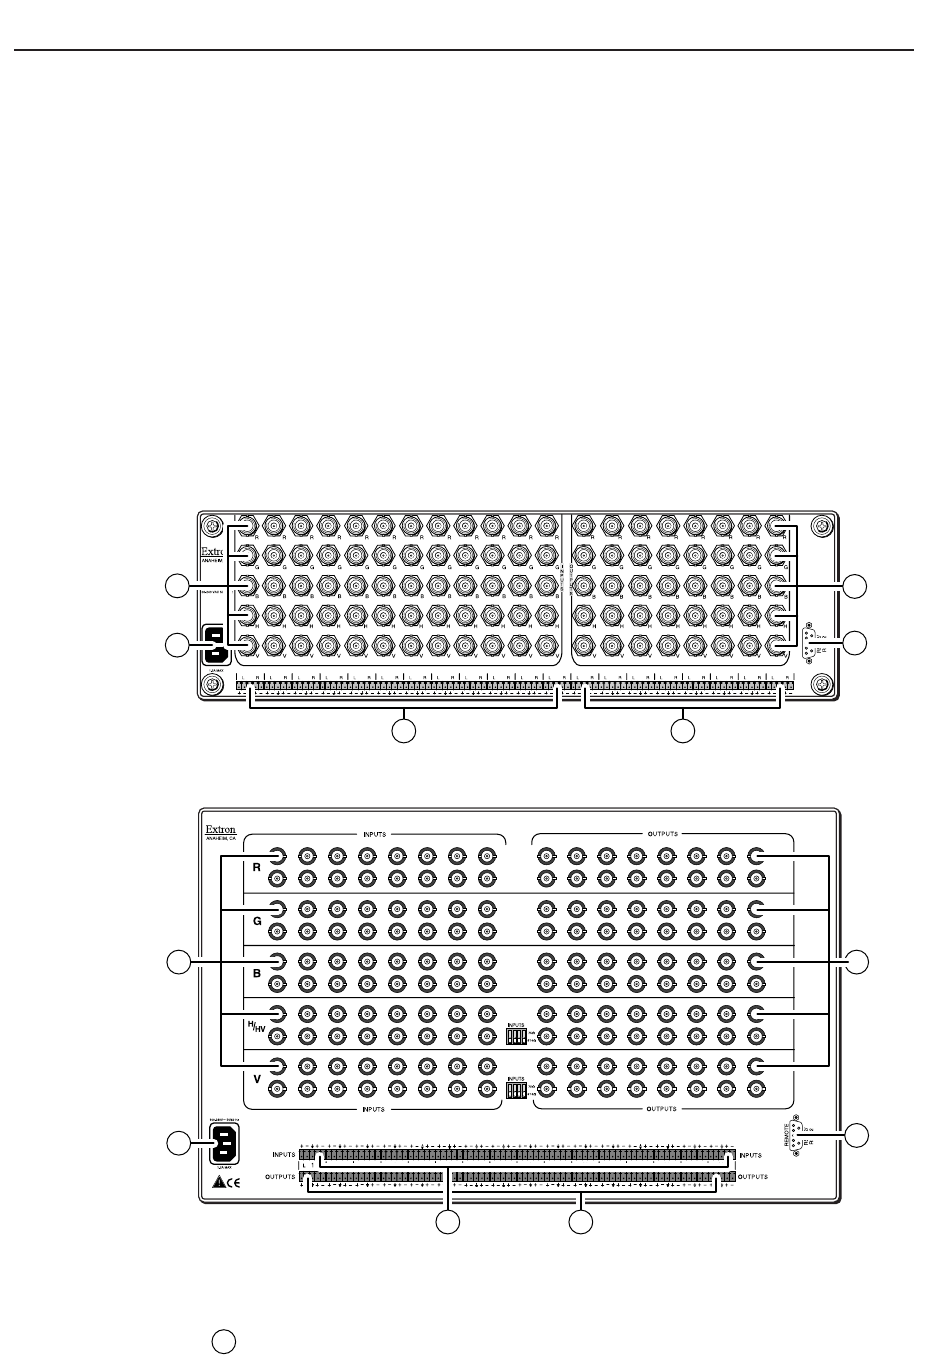
Cabling and Rear Panel Views
All connectors are on the rear panel. Figure 2-1 shows the CrossPoint 128HVA.
The CrossPoint 84, 88, and 124 are housed in the same 3U enclosure, but have fewer
input and/or output connectors to accommodate the different matrix sizes each
provides. Figure 2-2 shows the CrossPoint 1616HVA. The CrossPoint 168 is
housed in the same 6U enclosure, but has fewer output connectors to accommodate
its 16x8 matrix.
123456789101112
1 2 3 4 5 6 7 8 9 10 11 12
12345678
12345678
1
2
6
3
4 5
Figure 2-1 — Rear panel connectors, CrossPoint 128HVA
1
6
2
3
5
13579111315
2 4 6 8 10 12 14 16
13579111315
2 4 6 8 10 12 14 16
13579111315
2 4 6 8 10 12 14 16
13579111315
2 4 6 8 10 12 14 16
13579111315
2 4 6 8 10 12 14 16
13579111315
2 4 6 8 10 12 14 16
13579111315
2 4 6 8 10 12 14 16
13579111315
2 4 6 8 10 12 14 16
13579111315
2 4 6 8 10 12 14 16
13579111315
2 4 6 8 10 12 14 16
4
1357
1357
Figure 2-2 — Rear panel connectors, CrossPoint 1616HVA
Power connection
1
AC power connector — Plug a standard IEC power cord into this connector
to connect the switcher to a 100 to 240VAC, 50 Hz or 60 Hz power source.