


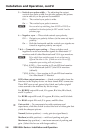
RGB 460xi Series • Installation and Operation
Installation and Operation, cont’d
2-10
Euro Channel and Floor Box Versions
The RGB 460xi and RGB 468xi are available in a
Euro Channel (EC) version, the RGB 460xi is available in two
oor box models (MK and FSR), and the RGB 468xi AKM UK is
designed for Ackermann oor boxes. (See appendix A for part
numbers.)
The front and rear panel features, cabling requirements,
and testing/troubleshooting procedures are identical to the
descriptions shown in this chapter for the wall box models. For
installation instructions, see the RGB 400xi Series installation
guide that addresses your specic requirements.
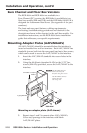
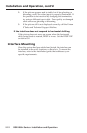
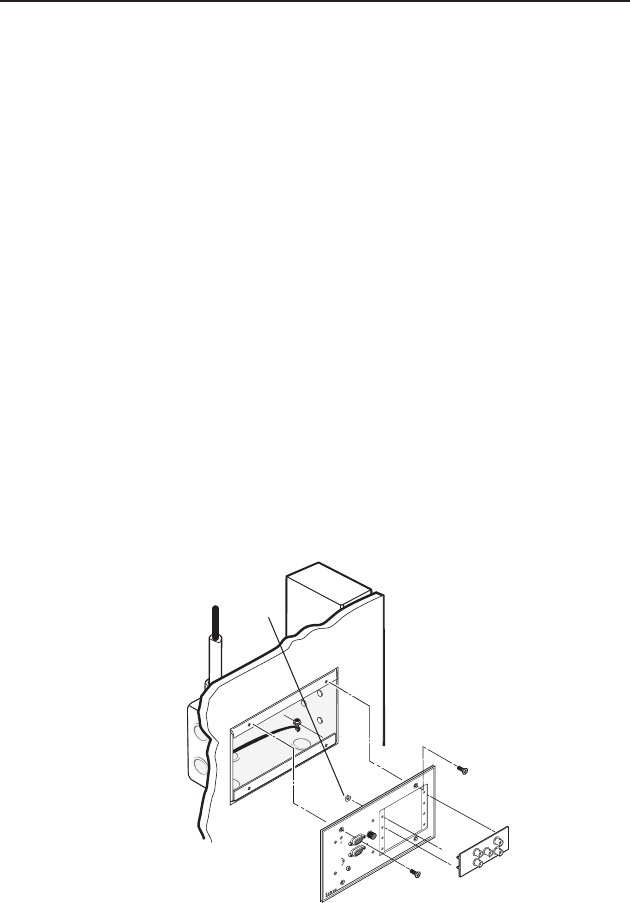
Mounting Adapter Plates (AAPs/MAAPs)
All AAPs/MAAPs should be mounted before the interface is
tested or installed in a wall or furniture. Each AAP/MAAP has
standoffs (screws built into the rear panel) and nuts/hex screws,
which can be used to secure the AAP/MAAP to the interface.
1. Insert the AAP/MAAP standoffs into screw holes in the
interface.
2. Using the #4-40 nuts (standard AAPs) or the 3/32” hex
screws (MAAPs) provided, secure the AAP/MAAP to the
interface.
Mounting an adapter plate (AAP shown)
3. Repeat steps 1 and 2 to mount other AAPs/MAAPs.
Cover any openings in the interface with blank
AAP/MAAP plates.
#4-40 Nut w/ Captive
Washer
4-gang Wall Box
H. SHIFT
MIN/MAX
TM
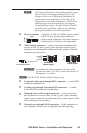
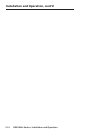
RGB 468xi
INPUT
MONITOR
AUDIO
RGB 468
WITH ADSP
MONITOR
NO MONITOR
The RGB 468 Mxi (not
shown) mounts from
the front using hex screws.
The RGB 468xi (shown)
mounts from the
rear using nuts.
0