


YCS SW6 MX • Installation and Operation
YCS SW6 MX • Installation and Operation
Installation and Operation, cont’d
2-52-4
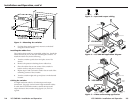
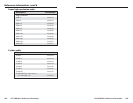
Figure 2 — Mounting the switcher
3. If a false front panel is required, mount it on the shelf
using the front two holes.
Installing the rubber feet
The switcher ships with four uninstalled rubber feet. Install the
rubber feet only if you are not rack-mounting the switcher. To
install the rubber feet, do the following:
1. Turn the switcher upside down and place it on a flat
surface.
2. Remove the protective backing from a rubber foot.
3. Place the rubber foot on one corner of the switcher’s
bottom surface, and press it into place.
4. Repeat steps 2 and 3 to install a rubber foot on each of the
remaining corners of the switcher.
5. Turn the switcher right side up and place it in the desired
location.
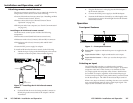
Cabling the switcher
Use high resolution cable for all video input and output
connections. See page A-4 for Extron’s high-resolution cables.
To cable the YCS SW6 MX switcher, connect the input and
output devices to the switcher using figures 3, 4, and 5 as
a guide.
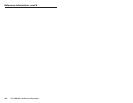
Figure 3 — Input and output cabling
Figure 4 — YCS SW6 MX application diagram
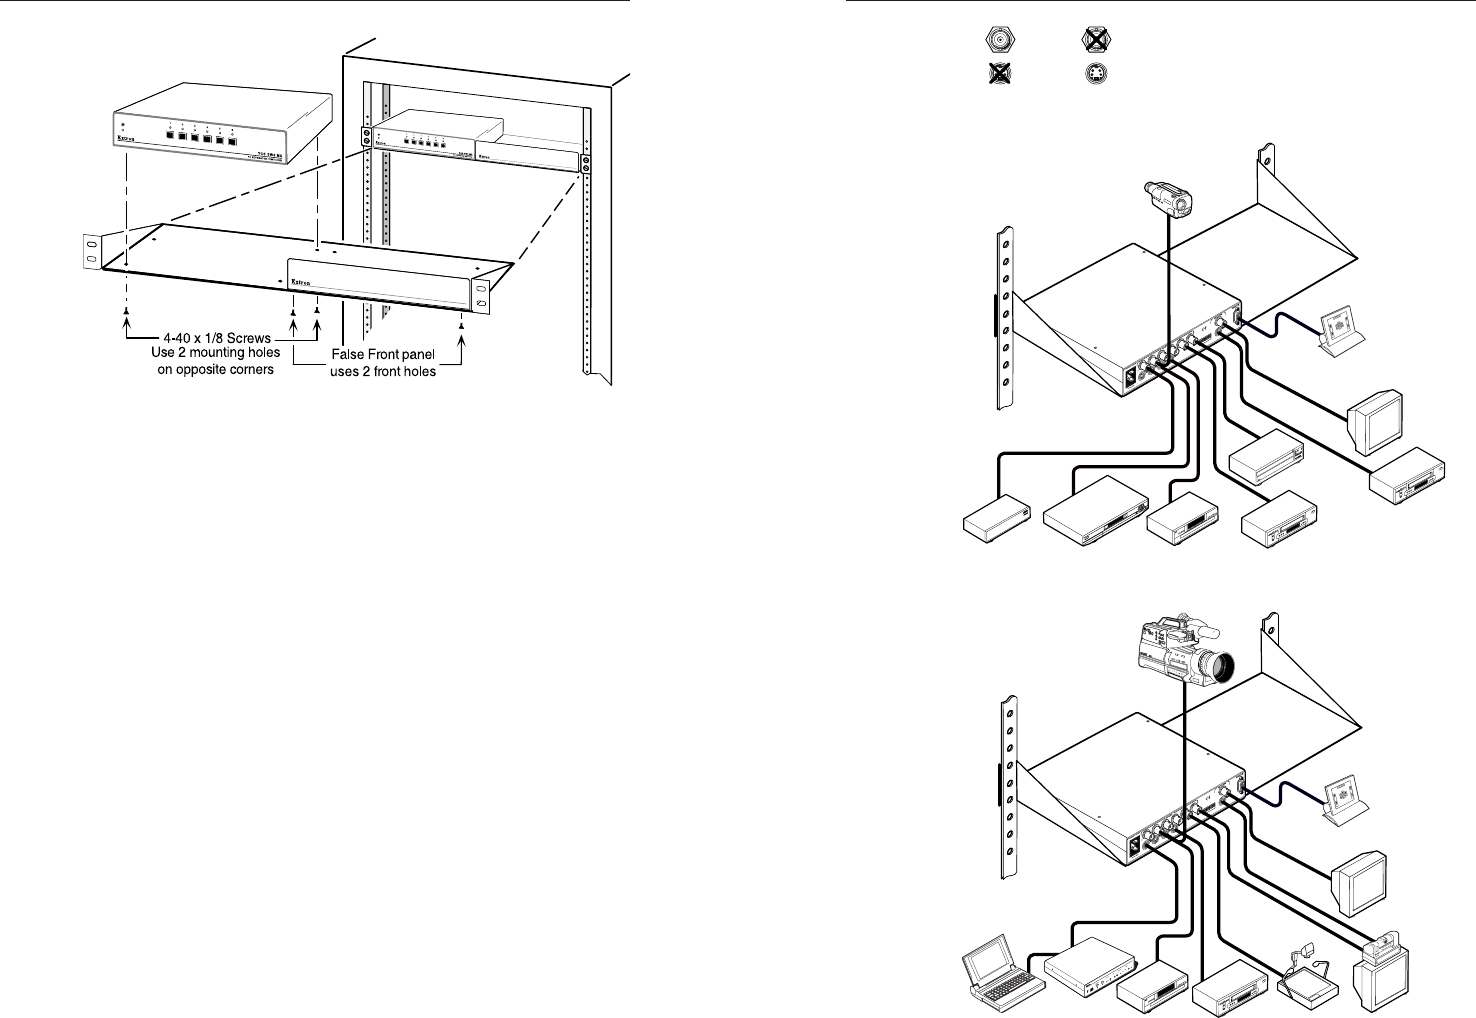
Figure 5 — Video conferencing application
RS-232 Control
DVD PlayersCable Box DSS Receiver
Monitor
VCR
VCR
Laserdisc Player
Video Camera
YCS SW6 MX
1
2
3
4
5
67
8
Composite
S-video
RS-232 Control
DVD PlayersLaptop
Extron
VSC 100GX
Preview
Monitor
VCR
Document
Camera
Videoconferencing
System
Video Camera
YCS SW6 MX
1
2
3
4
5
67
8
F
R
E
E
Z
E
ZO
O
M
OV
ER
U
ND
ER
C
E
N
T
E
R
I
N
G
/
P
A
N
VS
C
10
0G
X
F
I
L
T
E
R
I
N
G
G
E
N
L
O
C
K
HO
R
Z
VE
RT
I
I
I
S-VI
D
EO
R
GB
I
I
I
S
CA
N C
O
NV
ERT
E
R
M
IN
M
A
X
S
IG
NA
L
L
O
CK
BU
R
ST
L
OC
K
H
OR
Z
SU
B
PH
A
SE
PHA
S
E