4
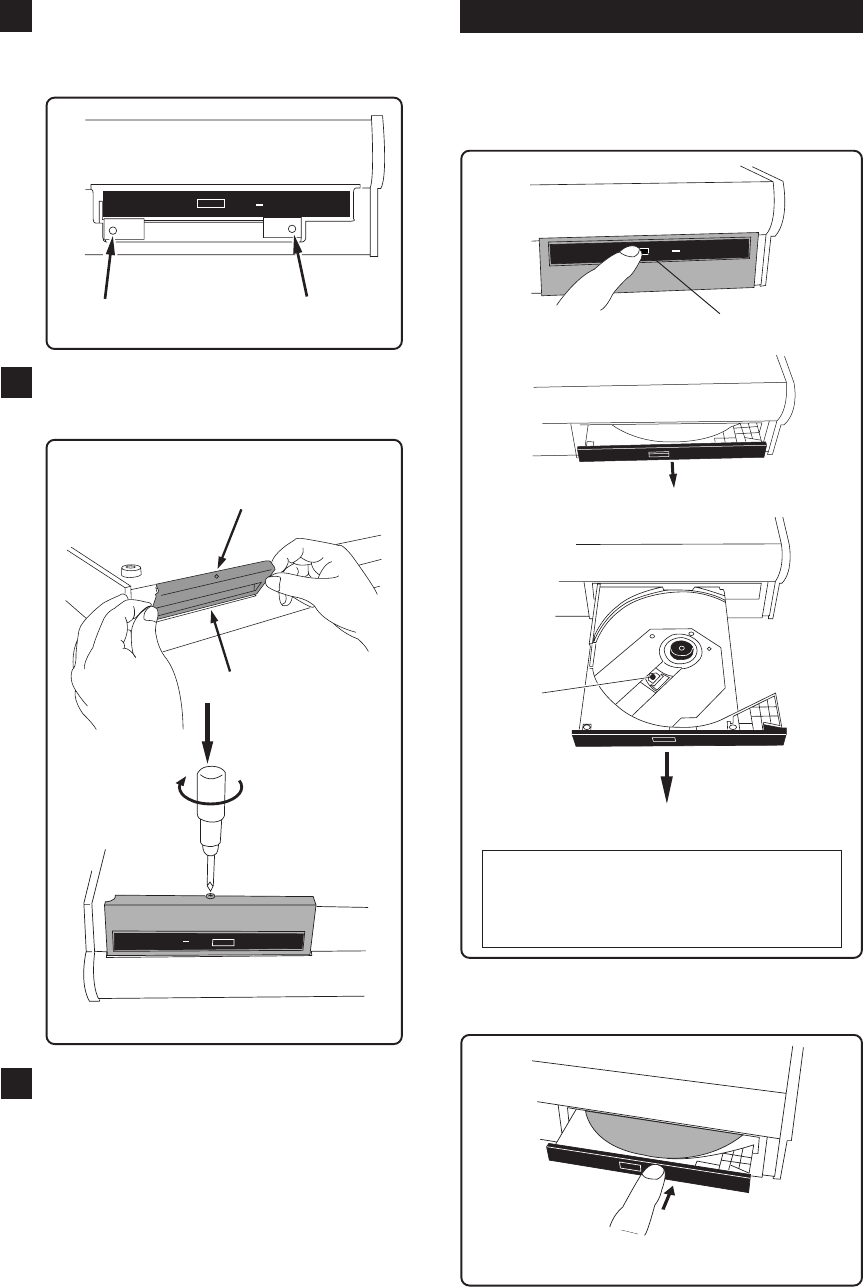
• To open the tray, press the eject switch lightly.
Pressing the switch will open the tray slightly.
Then pull out the tray gently by hand to fully open
it.
Pull out the tray to fully open it.
Eject switch
The tray slightly opens.
Opening/closing the tray
• To close the tray, push the tray inside by hand until
locked.
Push until it is locked.
3
Use two screws supplied with the CD-1A to fix
the CD-1A to the VF160 from the front panel.
Tighten the screws with a screwdriver.
screw position
screw position
4
Use the screw you removed in step 1 to fix the
blank panel supplied with the CD-1A to the front
panel.
Slant the panel slightly when inserting the
panel inside the unit.
Use the screw you re-
moved in step 1 to fix
the blank panel.
Connect the power cord of the VF160 and turn
on the power.
Make sure that the VF160 starts up, and the
LED indicator on the front panel of the CD-
1A blinks for a few seconds then turns off.
Wait until the VF160 display changes to the
Normal display from the start-up display,
and then you are ready to operate the CD-
1A.
5
<Caution!>
Do not touch the lens when pulling out
the tray, doing so may damage it and may
cause a malfunction.
lens


