Getting started
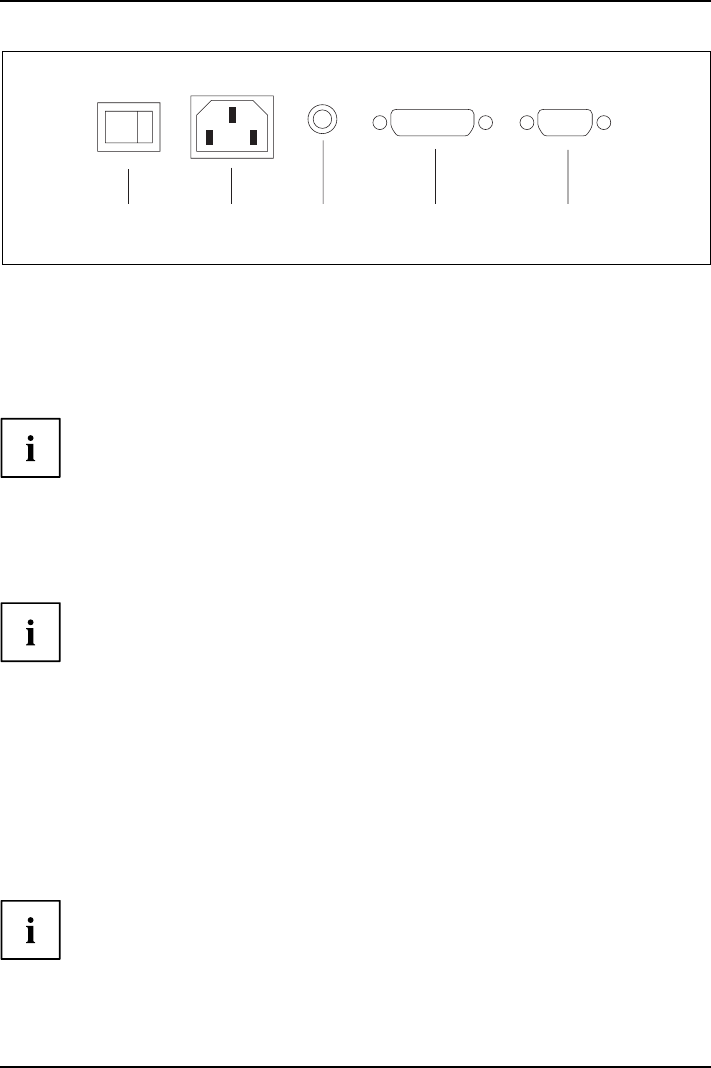
1 2 3 4 5
0 -
ECO / BASIC
1 = G reen standby mode switch
2 = Power connector
3 = AUDIO-IN socket
4 = DVI-D socket (DVI)
5 = D-SUB socket (VGA)
► Connect one of the connectors of the data cable to the D-SUB socket or DVI-D socket of
the monitor and secure the plug-in connection by tightening the safety screws.
The monitor automatically detects the input when only one signal source is connected.
► Insert one p
lug of the audio line in the AUDIO IN socket on the monitor
and make sur
e it is properly engaged.
► Plug the power cable supplied into the power connector of the monitor.
► Secure the co
ver over the connections.
A lock (Kens
ington Lock) can be mounted in the security s lot to protect the monitor
from theft.
A Kensington Lock is not included with the monitor at delivery.
Connecting cables to the computer
Information on the computer connections and interfaces is contained in the
operating manual for your computer.
► Connect the data cable to the (active) monitor port on the computer and secure
the plug-in connection by tightening the safety screws.
► Insert the other plug of the audio cable in the audio output of the computer.
► Plug the power connector of t he monitor into a properly grounded mains outlet.
► Plug the power connector of the compute r into a properly grounded mains outlet.
If your computer has two monitor ports ("onboard" screen co ntroller and separate
graphics card), the monitor port for the separate graphics card is active as standard.
A26361-K1317-Z220-1-7619, edition 2 13


