Installing and removing processors
Add-on modules / Upgrading
!
Exit energy-saving mode, switch off the system and remove the power plug from the
mains outlet, before carrying out any of the procedures described in this chapter!
Even when you have switched off the device, parts (e.g. memory modules, AGP and PCI
extension boards) are still supplied with power.
Installing and removing processors
Technical data
Intel Pentium 4 with 400 or 533 MHz system bus in the mPGA478 design.
Intel Celeron with 400 or 533 MHz System Bus in the mPGA478 design.
A current list of the processors supported by this mainboard is available on the Internet at:
www.fujitsu-siemens.com/mainboards.
Installing the processor with heat sink and fan (optional)
► Remove the fan that there may be and the heat sink.
3
2
1
A
4
5
3
2
1
A
4
5
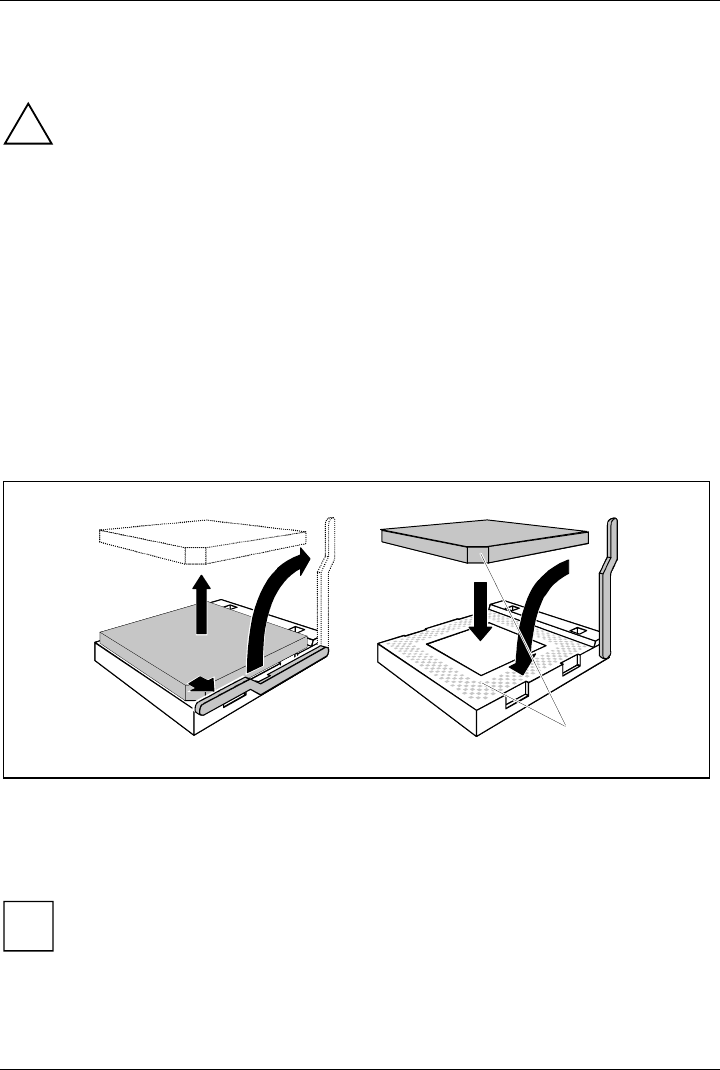
► Pull the lever in the direction of the arrow (1) and lift it as far as it will go (2).
► Remove the old processor from the socket (3).
► Insert the new processor in the socket so that the angled corner of the processor matches the
coding on the socket (A) with regard to the position (4).
i
The angled corner of the processor can also be at a different location than shown in the
illustration.
► Push the lever back down until it clicks into place (5).
16 - English A26361-D1740-Z120-1-6319, Edition: 3


