fi-553PR Imprinter Operator’s Guide | 9
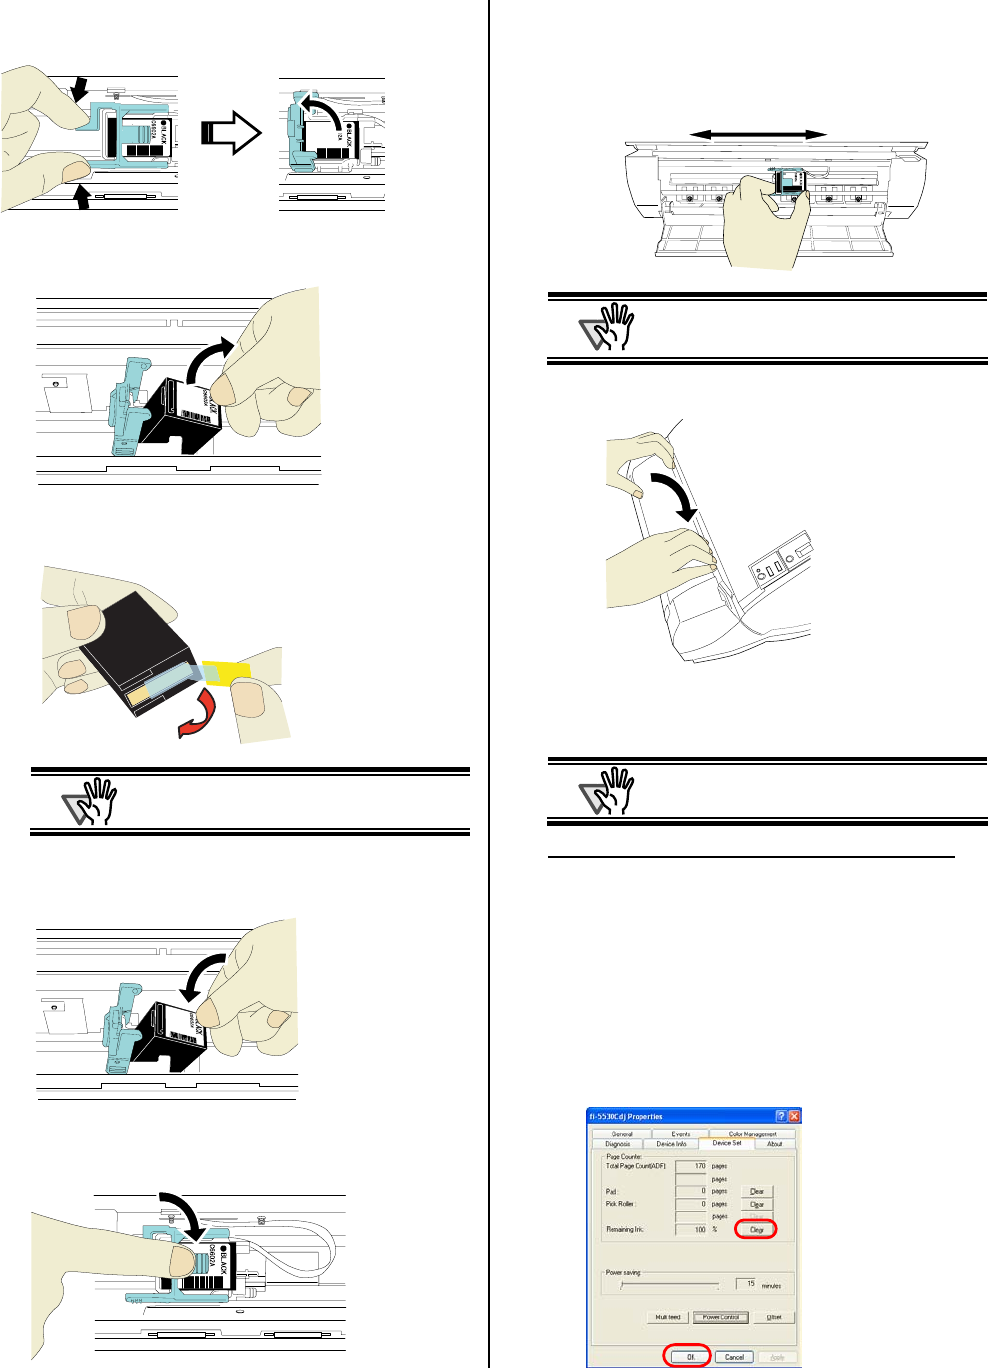
3. Pinch the Arm with your fingers as shown below
and release the Arm.
4. Remove the old Print Cartridge.
5. Remove the protection tape on the new Print
Cartridge.
TTENTION
Do not touch the metal part of the Print
Cartridge nor put the tape back again.
6. Put the Print Cartridge into the holder with its tab
pointing to the right.
7. Lower the Arm gently until it locks in to fix the Print
Cartridge in place.
8. Move the Print Cartridge Holder to an appropriate
printing position.
The holder should be positioned where the printing
area of document (Section 6) will pass under it.
TTENTION
When printing close to document edge, be
careful about the position so that characters
may not be printed off of the document.
9. Close the Print Section Cover.
10. Turn on the scanner.
11. Reset the Remaining Ink Counter.
TTENTION
You must clear the Remaining Ink counter
whenever you replace the Print Cartridge.
For Windows 98, Windows Me, Windows 2000, Windows XP
c On the [Start] menu, select [Control panel].
d Select [Scanners and Cameras].
e On fi-5530C icon,
right click and select [Properties] (for Windows Me,
Windows XP),
or double click (for Windows 98, Windows 2000).
f Click the [Device Set] tab.
g Click the [Clear] button on [Remaining Ink].


