


6
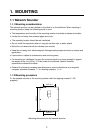
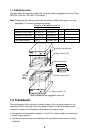
2.2 Settings for Single Network Sounder
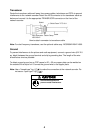
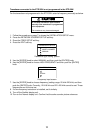
WARNING
ELECTRICAL SHOCK HAZARD
Do not open the equipment.
Only qualified personnel
should work inside the
equipment.
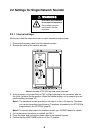
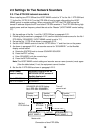
2.2.1 Internal settings
Set the tap inside the network sounder to match transducer output power.
1. Disconnect the power cable from the network sounder.
2. Remove the cover of the network sounder.
. . . . .
A B C D E
A B C D E
TA P
H
TA P
L
. . . . .
J2
J9
Network sounder ETR-30N, top view, cover removed
3. Using a pincers, set jumper block of TAP H (High) referring to the transducer label on
the cover. Jot down the tap position. When the NavNet display unit is powered you can
confirm setting (see page 10).
Note 1: The transducer model recorded on the label is in the unit’s memory. Therefore,
you can set transducer type following “Transducer connected to the ETR-30N is
programmed in the ETR-30N” (page 9.)
Note 2: To connect other make of transducer contact your FURUNO dealer for details.
4. If a low frequency transducer is installed, set TAP L.
5. Close the cover and connect the power cable to the network sounder.
6. Confirm that the HOST NAME control is in the “0” position.