


TCP/IP Print Server – Changing TCP/IP or Host Access Configuration (10/29/01 mlr) 5
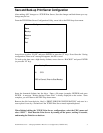
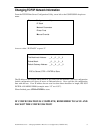
Save and Back-up Print Server Configuration
After making ANY changes to a TCP/IP Print Server, Save the changes and back them up or any
change may be lost.
From the TCP/IP Print Server Configuration Utility, arrow left to the FILE drop down menu.
Arrow down to select “SAVE” and press ENTER (or press the “S” key). Note: Once the “Saving
configuration, Please wait” message disappears, the file is saved.
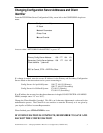
To back-up the data onto a high density diskette, arrow down to “BACKUP” and press ENTER
(or press the “B” key).
Enter Backup Filename:
A:\ .CFG
ESC to Cancel, Enter to Start Backup
Insert the formatted diskette into the drive. Enter a file name (example: PRTSER) and press
ENTER. A message “Writing backup, Please Wait” is briefly displayed on the screen. Once
complete, you will return to the FILE drop down menu.
Remove the disk from the drive, label it “PRINT SERVER CONFIGURATION” and store in a
secure place for use by a Technician if the TCP/IP Print Server needs repaired/replaced.
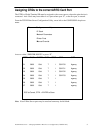
When finished editing the TCP/IP Print Server configurations, select the FILE menu and
select “EXIT”. Hard Boot the Print Server by turning off the power, waiting 10 seconds,
and turning the Print Server back on.
File Configure Help
Save
Backup
Restore
Print
Exit