7-19
Configuring Secure Socket Layer (SSL)
Configuring the Switch for SSL Operation
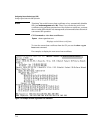
Using the CLI interface to enable SSL
To enable SSL on the switch
1. Generate a Host certificate if you have not already done so. (Refer to “2.
Generate the Switch’s Server Host Certificate” on page 7-9.)
2. Execute the web-management ssl command.
To disable SSL on the switch, do either of the following:
■ Execute no web-management ssl.
■ Zeroize the switch’s host certificate or certificate key. (page 7-10).
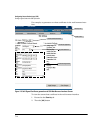
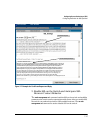
Using the web browser interface to enable SSL
To enable SSL on the switch
i. Proceed to the Security tab then the SSL button
ii. Select SSL Enable to on and enter the TCP port you desire to
connect on.
iii. Click on the
[Apply Changes] button to enable SSL on the port.
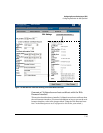
To disable SSL on the switch, do either of the following:
i. Proceed to the Security tab then the SSL button
ii. Select SSL Enable to off .
iii. Click on the
[Apply Changes] button to enable SSL on the port.
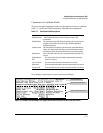
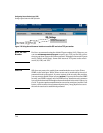
Syntax: [no] web-management ssl
Enables or disables SSL on the switch.
[port < 1-65535 | default:443 >]
The TCP port number for SSL connections (default:
443). Important: See “Note on Port Number” on page
7-20.
show config
Shows status of the SSL server. When enabled, web-
management ssl appears in the config list.


