


07/02 ColorFlex 13-13
Installation
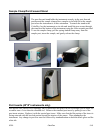
The following instructions guide you through the initial installation of your ColorFlex system.
1. Unpack all cartons and remove wrappings and cable ties. Inspect for damage and notify the carrier
and HunterLab immediately if any is discovered. Save the packing materials in case it becomes
necessary to return the instrument to the factory.
2. Place the ColorFlex on a flat, stable surface near an electrical outlet.
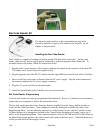
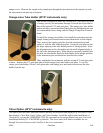
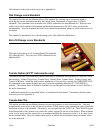
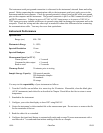
3. Connect the jack connector of the AC adapter to the jack acceptor on the left back of the ColorFlex.
4. Plug the female end of the power cord into the AC adapter and the male end into a wall outlet.
Note: Refer to page 13-18 for recommendations concerning the power line and its conditioning.
CAUTION
Use only the power cord and AC adapter included with this instrument or a
replacement obtained from HunterLab (HunterLab Part Number C04-1005-631 for
adapter, A13-1002-655 for 110V cord, A13-1002-656 for 220V cord). Be certain that
the power cord is in good condition before connecting it.
The ColorFlex is grounded using the grounding portion of this power cord. Only
plug this cord into a properly grounded power outlet. Do not use an inappropriate
adapter to plug the instrument into an ungrounded outlet or electric shock may
occur. More information on the wiring of the power cord can be found on page
13-19.
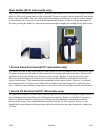
5. Plug the 9-pin connector end of the communications cable into the 9-pin adapter on the back of the
ColorFlex.
6. Plug the second 9-pin connector of the communications cable into the appropriate communications
port of the computer.
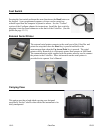
7. Install the foot switch, if one has been purchased.
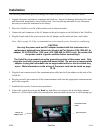
8. Turn on the system by pressing the Read key and allow it to warm up for at least thirty minutes
before use. (If the screen clears, the instrument has entered standby mode, but is still warming up.)
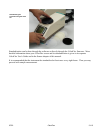
Jack for AC
ada
p
ter cable
Connector for foot
switch
9-pin serial port