


4. Click Next.
5. Select Primary Partition, and then click Next.
The partition size defaults to the maximum.
6. Click Next.
7. Assign a drive letter, and then click Next.
8. Select the NTFS format, enter the volume name, and then click Next.
9. Review your selections, and then click Finish to complete the formatting.
In Windows Vista and Windows 7:
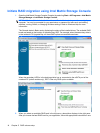
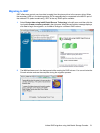
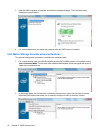
1. Select Start, right-click Computer, and then click Manage from the drop-down menu. The
Computer Management window displays.
2. In the left pane under Storage, click Disk Management. The Disk Management window displays
Unallocated space and three partitions—(C:), HP_TOOLS, and HP_RECOVERY.
NOTE: The drive letters may vary depending on your system configuration.
3. Connect an external USB drive with at least 10 GB of free capacity to a USB port on the computer.
4. Open Windows Explorer, and then select the primary drive (C:).
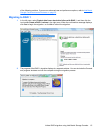
5. Select Organize > Folder and Search Options.
6. Click the View tab.
7. Under Hidden files and folders, select the radio button next to Show hidden files and folders.
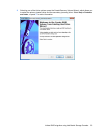
8. Uncheck the box next to Hide Protected Operating System Files, and then click OK.
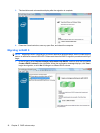
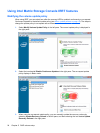
9. Select the HP_RECOVERY partition in the left pane, and then copy its contents (\boot, \sources,
\system.save, bootmgr, and HP_WINRE) to the external USB drive. If the Destination Folder
Access Denied window displays, click Continue to copy the file. If the User Account Control window
displays, click Continue.
10. Select the HP_TOOLS partition in the left pane, and then copy its contents (Hewlett-Packard) to
the USB drive.
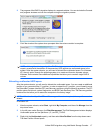
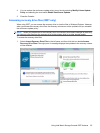
11. Return to the Disk Management window and select the HP_RECOVERY partition. Then click the
delete icon in the menu bar. Repeat this procedure for the HP_TOOLS partition. The amount of
unallocated capacity increases.
12. Right-click the (C:) drive, and then click Extend Volume from the drop-down menu. The Extend
Volume Wizard opens.
13. Click Next.
18 Chapter 5 RAID volume setup