User’s Guide 33
3
Adjusting the Projector
This chapter describes how to make adjustments to the projector.
■ “Adjusting the Picture and Sound” on page 33
■ “Using the On-Screen Menu” on page 36
Adjusting the Picture and Sound
This section provides the following instructions on adjusting the picture and sound.
■ “To adjust a slanted picture” on page 33
■ “To adjust the image according to the type of picture” on page 34
■ “To adjust other image settings” on page 34
■ “To adjust the audio” on page 34
■ “To adjust the projector setup” on page 35
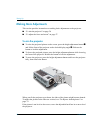
To adjust a slanted picture
If the picture has slanted sides on the screen, you can straighten them. This is done by
making the top or bottom shorter until the sides are straight.
1. Open the on-screen menu and select Quick choice > Keystone.
2. Adjust the keystone setting as needed using the menu buttons on the projector or
remote control:
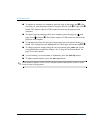
❏ If the top of the picture is too wide or too narrow, press left or right
until the width is corrected.
❏ If one side of the picture is too tall or too short, move the projector until it is
straight in front of the screen, not off to one side.
3. Press the back button to save the settings.


