


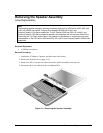
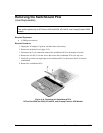
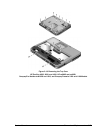
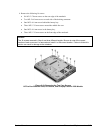


Removing the Display Assembly
(Authorized Service Providers Only)
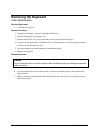
Required Equipment
• #1 Phillips screwdriver.
Removal Procedure
1.
2.
3.
4.
5.
6.
7.
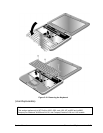
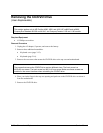
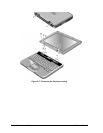
Unplug the AC adapter, if present, and remove the battery.
Remove the keyboard cover (page 2-12).
Remove the two M2.5×6.0 mm retaining screws from the notebook rear panel.
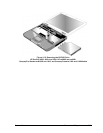
Remove the M2.5×4.0 mm screws from the left and right antenna PCAs. Relocate the antenna
PCAs away from the display assembly hinges.
Disconnect the display assembly cable from the motherboard.
Remove the six M2.5×6.0 mm retaining screws that secure the display assembly to the top case.
Note that there is a grounding strap at the left hinge.
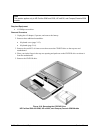
Lift the display assembly off of the notebook.
Service Manual Removal and Replacement 2-23