


OptiPrinter PRO CD/DVD Inkjet Printer
ZZ 004 821 - 12 -
SECTION 7: INSTALLING THE PRINTER SOFTWARE
Note:
Your OptiPrinter PRO should not be connected to your PC during the initial software
installation. If connected, remove the USB and power cables from the printer. There
may be variations in the following instructions depending on operating system (2000 or XP)
and configuration.
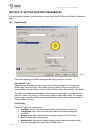
1. Place the Printer Driver CD into the CD-ROM drive of your PC. The Verity_OptiPrinter Pro
installation wizard should automatically start.
2. Follow the on-screen instructions, clicking Next when prompted. When prompted, click
Install to begin installation.
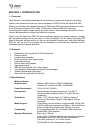
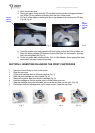
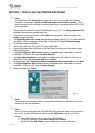
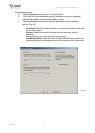
3. The Digital Signature Not Found message box will appear (see Fig.11). You will be asked if
you wish to continue installation, select Yes. In Windows XP, select Continue Anyway.
4. On the final screen click Finish.
5. Connect the OptiPrinter Pro to your PC via the USB cable.
6. Connect the power cable to the back of the OptiPrinter Pro and plug into the power supply.
Switch on the printer.
7. If the Digital Signature Not Found message box appears again, select Yes to continue
installation. In Windows XP, select Continue Anyway.
8. The Found New Hardware box will appear on screen, which will search for the driver. In
Windows XP select No, not at this time and click Next.
9. At the next box, select Install the software automatically (Recommended) and click Next.
10. If the Digital Signature Not Found message box appears again, select Yes to continue
installation. In Windows XP, select Continue Anyway.
11. When prompted, click Finish.
Note:
The message, which appears above, is merely precautionary from Windows and it is not
necessary to stop the installation.
Note:
If your PC does not recognize the new OptiPrinter PRO hardware when you first connect it
to your PC, you should load the print driver via the Add Printer icon on your Printer
settings:
a. Place the Print Drive CD into your PC’s CD-ROM drive
b. On you PC’s desktop, select Start, Settings and Printers
c. Double click the Add Printer icon and follow the on screen instructions
Fig. 11